This week, we made some important updates to the way band members and support roles are managed in Sonicbids that we’re excited to share with you. We cleaned up the user interface, separated band members and support roles into two different sections, added the ability to manage which users have admin permissions, and added a brand new alias feature that lets you control how you and your band members’ names are displayed publicly and in promoters’ inboxes.
Let’s get started!
How to manage your band members
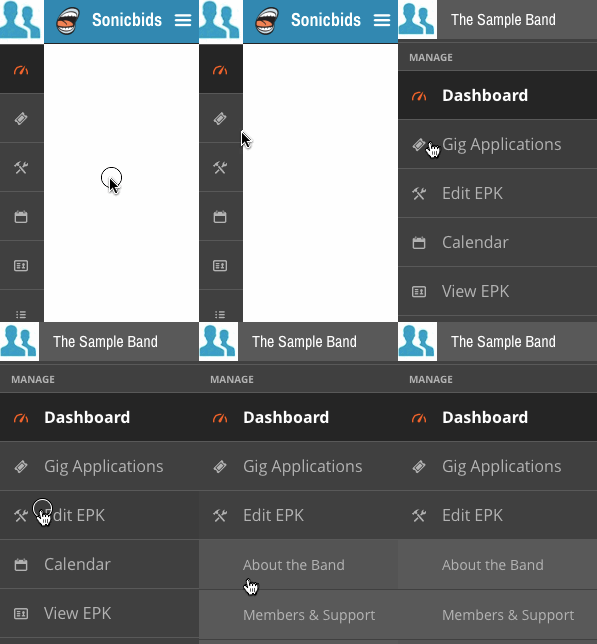
1. There are two ways to access your band members. Once you’re logged in to your account, you’ll see your Dashboard by default. From here, you can navigate to the Members & Support page by doing either of the following:- Clicking Edit EPK > Members & Support
- Hovering over the sidebar on the left, then clicking Edit EPK > Members & Support
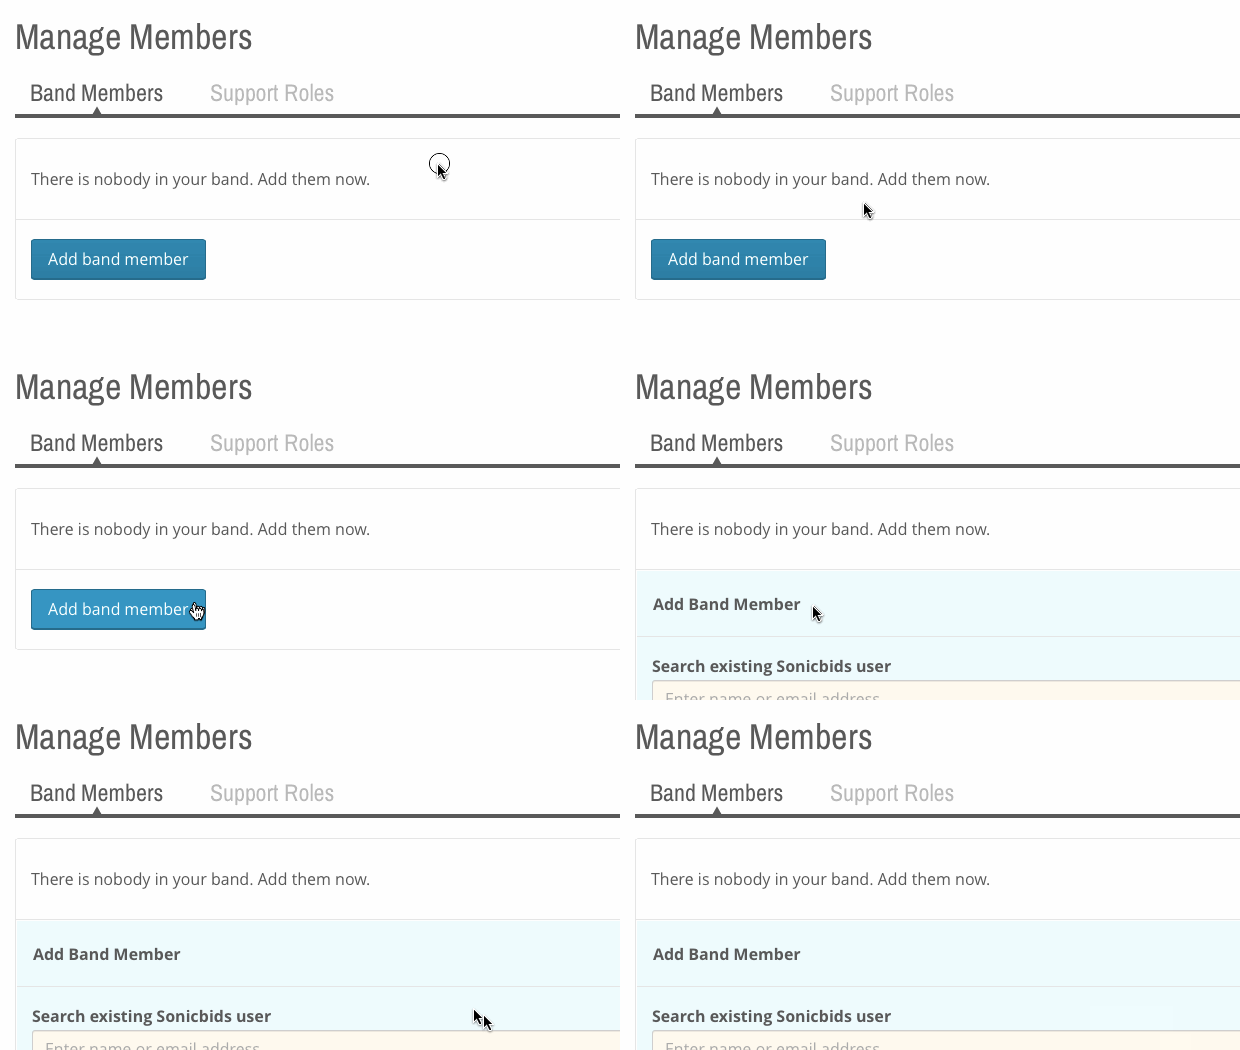
2. To add a new band member, click Add Band Member.

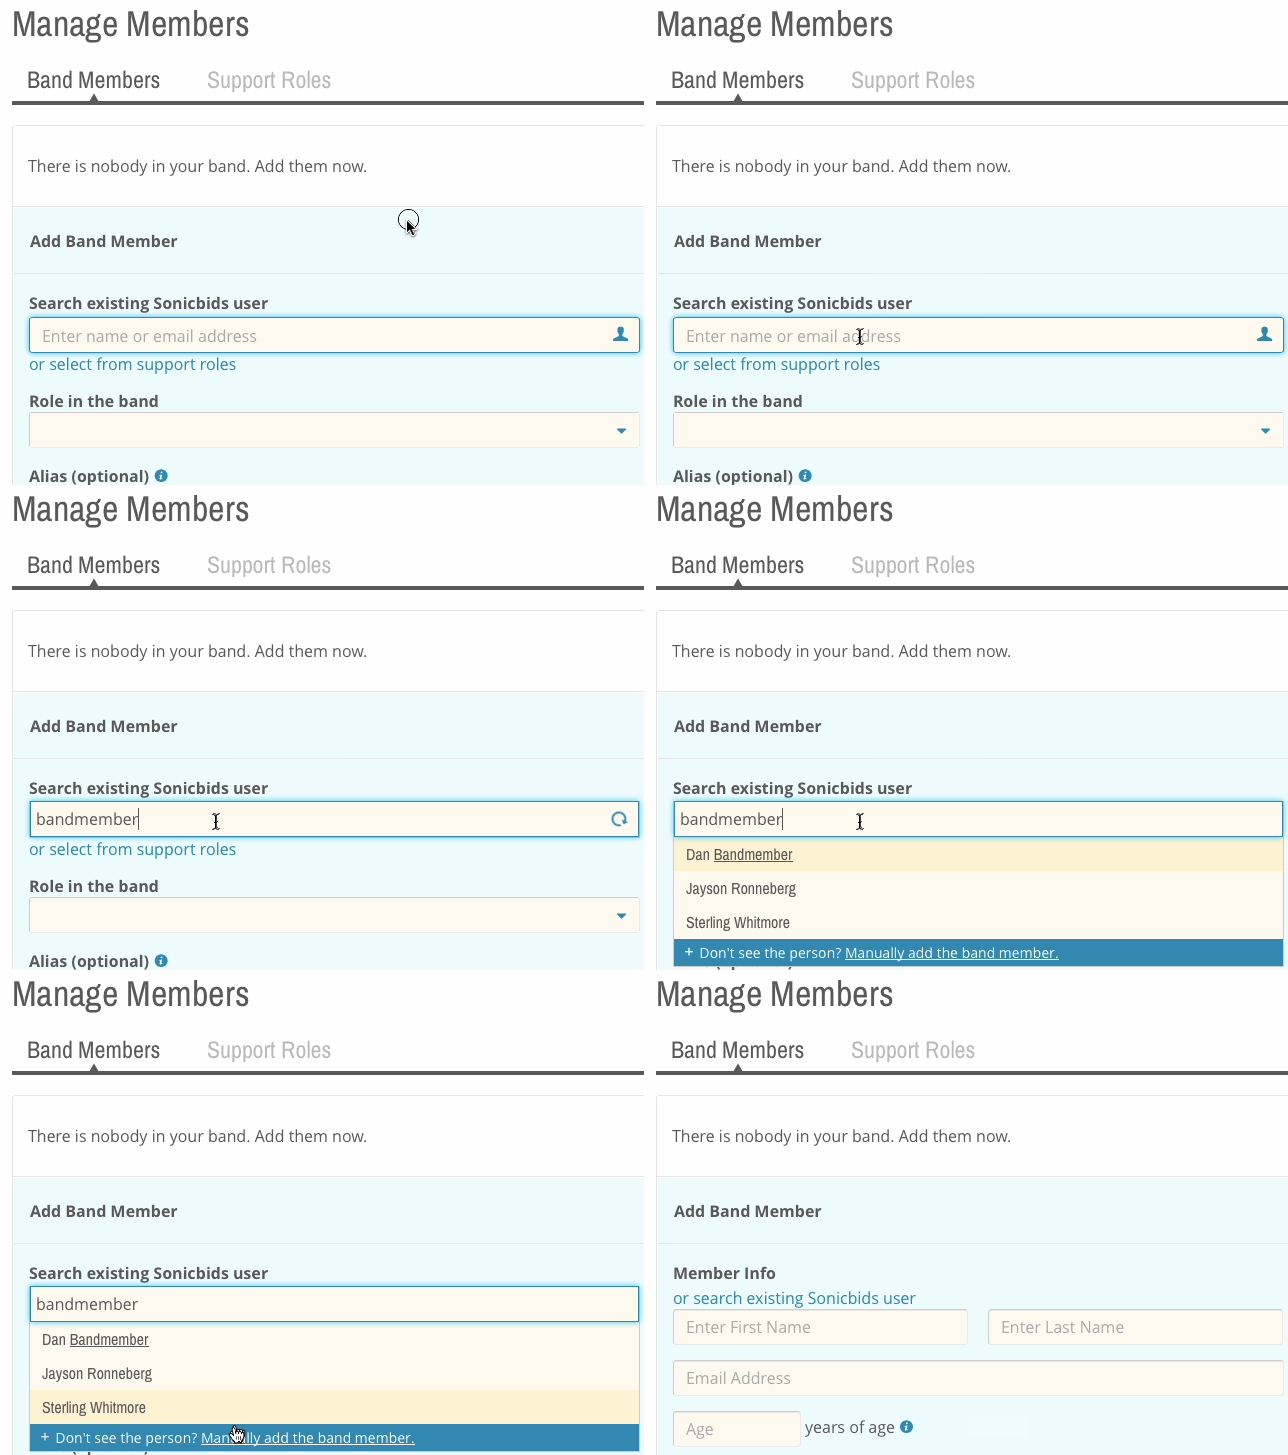
3. Start typing in the name of an existing Sonicbids user, then click on the name when it pops up to add the user as a band member.
- If the person’s name is not showing up in the dropdown list, then he or she is not in our system. In this case, click “manually add the band member” at the bottom of the dropdown, fill in all of the necessary information, and click Add.

- Please note: The email address you enter for this band member will not receive any marketing emails or spam. The only reason we ask for this is so that we can uniquely identify each user in our system.
4. Enter the person’s role(s) in the band.
5. If the person goes by an alias that is different from their real name, you can optionally enter an alias to display publicly and in promoters’ inboxes.
6. If this band member is a front person, check off the “front person” box.
7. If you’d like to give this user admin permissions so that they can apply to gigs, edit the EPK, manage band members and add shows to the calendar, check off the “assign admin permissions” box.
8. Click Add and you’re all set!
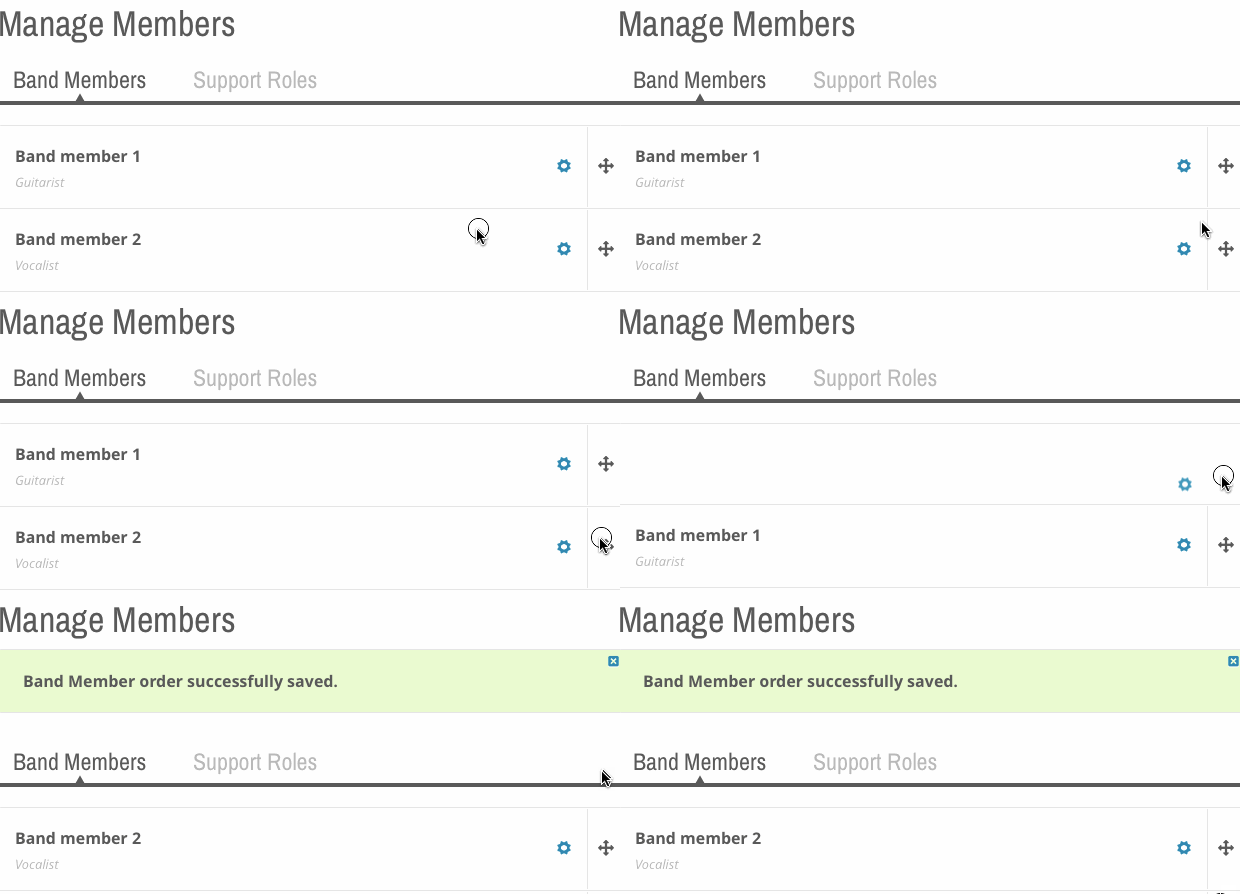
9. To rearrange the order in which your band members appear on your EPK, simply drag and drop using the arrow icons on the right.

10. To edit a band member’s information, click the gear icon and then click Edit band member.
![]()
11. To remove a band member, click the gear icon and then click Remove band member. Be careful – this cannot be undone!
How to manage your support roles
1. Once you’re on the Members & Support page (see step 1 of “how to manage your band members” above), click on the Support Roles tab.
2. Click Add support role, then select manager, touring manager or agent.
3. Follow the same process as step 3 of “how to manage your band members” above to add a new support role. You also have the option of selecting a support role from existing band members. If one person has multiple support roles, please add them one at a time.
4. To edit a support role’s information, click the gear icon and then click Edit support role.
5. To remove a support role, click the gear icon and then click Remove support role. As with removing band members, this action cannot be undone.
We hope this walkthrough was helpful! If you have any questions, feel free to reach out to us at support@sonicbids.com.


