 Image via Shutterstock
This article originally appeared on TuneCore.
Over years of teaching others how to mix, I’ve noticed 10 compression mistakes come up time and time again. These common mistakes can ruin your mix if you don’t know how to avoid them.
In this guide, you’ll learn what these common compression mistakes are and how you can avoid them to get clear, professional-sounding mixes.
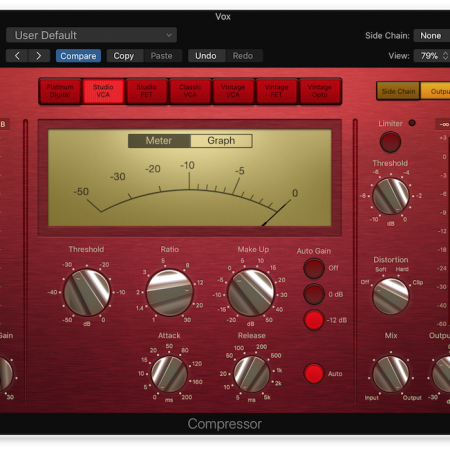
1. Ignoring the gain-reduction meter
Any compressor you use will have some kind of meter that shows you how much gain is being reduced. Make sure you aren’t ignoring it – especially when applying sidechain compression.

Sometimes, it’s difficult to tell how much you’re compressing the sound just by ear. If you aren’t paying attention to your meter, you may be applying way too much compression or no compression at all.
You don’t need to simply listen and guess. This meter will tell you exactly how much you’re compressing the sound.
Open your compressor of choice, and watch how the gain reduction increases as you turn down the threshold. If you lower the threshold or turn up the ratio, you’re compressing the signal harder.

If you’re looking for compression that sounds smooth and transparent, shoot for somewhere between two and four dBs of gain reduction. If you’re working in a heavier genre where obvious compression is okay, you may want six to 10 dBs of compression.
Different sounds have different needs, so use your ears while watching the meter to determine how much compression sound good for your needs.
By paying attention to your gain reduction, you’ll know exactly how hard your compressor is working and can avoid over or under-compressing.
2. Using extremely fast attack times
When your attack time is too fast, it grabs the initial “hit” (also called the transient) of the note and turns it down.

When you compress too hard with fast attack times, the dynamic range of your mix is squashed. You’ll end up with something that sounds like this:

A song with no room to breathe; as flat as a pancake.
The beginning of notes are often the exciting part that cuts through the mix and wows your listeners. If your compressor works too fast, you’ll lose some of that effect.
There are some situations that call for a fast attack time, particularly drums. When it comes to drums, if your attack time is too slow, you’ll only be compressing the the tail end of each drum hit. Not usually what you’re going for when honing your drum’s dynamics.
But in almost any other instance (especially when mixing vocals), you don’t want a fast attack time shooting down the beginning of your sound.
With a slower attack time, the initial transient will be intact because you’re mostly compressing the tail end of the sound. This will make whatever instrument you’re compressing sound more exciting since the onset of the sound feels louder.
With slow attacks you’ll also have an easier time avoiding over-compression. If you’re really compressing a sound with 10 dB of reduction, a slow attack will roll that compression in gradually.
This gradual compression will sound more natural, while a fast attack that will crush your transient, making it sound extremely compressed.
But what number should you pick for your attack time?
As you might expect, there’s no tried and true “right number.” Your best bet is to listen closely while adjusting the attack.
Turn the threshold really high so the compression is obvious. Then gradually decrease the attack time until the instrument starts to sound dull and lifeless. This will help you get a feel for how fast of an attack time is too fast.
Now that it sounds a little lifeless, bring the energy back by increasing the attack time a bit. Don’t forget to turn the threshold back down! Obvious compression is helpful for finding a good attack time, but you don’t want to leave it like that on accident.
3. Always using fast release times
This is another surefire way to make your mix sound over-compressed.

If your release time is too short, you aren’t letting the note ring out naturally. Your compressor begins reducing the gain and then immediately lets go. The tail end of the sound suddenly gets louder than it was before, and your song sounds like it’s pumping.
By slowing the release time you’ll get subtler, much more natural sounding compression. It tames the dynamics without calling attention to itself.
As always, there are exceptions. If you want to preserve the latter part of a snare hit, you may want to use a fast release. You can also make vocals sound louder by shortening the release time.
But if you don’t have a specific reason to use a fast release, stick with one that’s moderate or slow.
To dial in your release, turn your threshold down again and start with a really fast release time. Turn the release time up slowly while listening to the track. Once it sounds like the compressor is breathing naturally with the mix, you’ve found the release time you’re looking for.

4. Only using one compressor
Have a guitar take that’s dynamically all over the place? Or maybe a vocal that isn’t quite cutting through the mix?
Compression can definitely tame a sound that’s inconsistent or boost one that’s underwhelming. But making huge cuts with one compressor is the wrong way to go.
Say you’re compressing a bass guitar with 9 dB of gain reduction. You may be getting the volume you want from the bass, but it’s going to sound pretty processed.
By using more than one compressor, you can get the same amount of gain reduction in a way that sounds more musical. This is a technique called serial compression.
Serial compression is when you put multiple compressors on the same sound. A single compressor that’s working super hard will stick out like a sore thumb in your mix. But multiple compressors working together can give you greater gain reduction while sounding much more natural.
Serial compression is all about small cuts. Each compressor on your track should only be reducing the gain by one-to-three dB’s.
So instead of using one compressor on the bass to turn it down nine dB, try using three compressors that are reducing three dB each. Though it’s technically the same amount of reduction, your bass is going to sound more dynamic and less compressed.
At the start of your serial compression chain, try using a compressor with a faster attack time. But not super fast! You’re just trying to subdue particularly strong peaks here; be careful not to squash your sound.
Follow this faster compressor with one that has a slow attack time. This slower compressor is going to focus on control of the sound overall, allowing you to gradually reduce gain.
5. Only relying on compression
Too much compression can make your tracks distort. This distortion can sound cool on a rock mix, but most of the time you won’t want your mix to sound super compressed.
To avoid over-compression but still keep your levels in check, automate the volume of your tracks.

If you have a guitar part that gets really quiet during the verses, don’t compress the life out of the whole track just to turn the loud parts down. Use automation to turn it up during the verses.
Automate the volume of your vocals and instruments. You’ll avoid distortion from over-compression and keep your levels in check.
6. Ignoring genres
Different styles of music have different needs when it comes to mixing. The way you’d mix a garage-rock tune won’t work for a recording of a hip-hop cypher.
This is especially true when it comes to compression. Genres that are meant to be super dynamic, such as classical and jazz, aren’t going to need much compression in the mix. You might not use any!
But more abrasive, in-your-face music like rock is going to need a ton of compression to highlight the energy.
Pop is somewhere in between. Dynamic consistency and a powerful vocal is important for pop, so there are going to be a lot of compressors in a pop mix. But those compressors won’t be working super hard. Pop isn’t usually meant to sound distorted and rough, so hard compression won’t be particularly helpful.
Whatever genre you’re working in, consider the amount of compression the style calls for.
When listening to other songs in your genre, is the volume consistent or does it change over the course of the song? Do other songs in the genre feel punchy and sharp or are they smooth?
Using a reference track while mixing will help you figure out how much compression you should use. Pick a song you’d like your mix to sound like and compare your mix to it while you work.
Listen for how much compression is being applied in your reference track and try to emulate it for your own song.
7. Not having intention
It can be easy to get in the habit of throwing a compressor on every track because we assume we should. But not every sound needs to be compressed. You aren’t doing yourself any favors throwing compression on tracks that already sound fine.
The intention should come first. Before you reach for a compressor, you should know why you’re using it.
The main reasons you will find yourself using compression are for energy and dynamic control. If you want to highlight the aggressive parts of a sound’s transients or to tame its dynamics, compression makes sense.
If you aren’t accomplishing one of these two tasks, you might not need to compress the sound.
Say you have a vocal that’s dynamically consistent but feels pretty lifeless. Even though the volume is under control, you might use a compressor to add some bring out some excitement and energy in the vocal.
If the bass isn’t sitting right in the mix because it’s too quiet at some parts and too loud at others, turning to a compressor makes sense. You aren’t compressing the bass simply because you assume you should. You need to control the bass dynamics and have a specific reason to use compression.
8. Ignoring stock plugins
An extremely common mistake is assuming the stock compressors that come with your DAW aren’t as good as premium ones.
Premium compression plugins usually model older hardware compressors. These older compressors sound great and can add wonderful color to a track.
But a lot of musicians who turn to premium plugins find themselves stockpiling different compressors with very specific uses.
You could end up with 10 different compressors to choose from. Instead of focusing on mixing, you sink a ton of time into trying out different ones to see which one is “just right.”
But the stock compressor in your DAW will probably be able to do a lot of the same things while saving you time and money. Stock compressors usually come with a wide range of attack times, release times, and even different modeling settings.
Take Logic’s stock compressor for example. It has seven different models to choose from that all color the track differently. The default setting focuses on a clean, digital sound. But the other settings model famous compressors such as the LA-2A, 1176, and the Red 3.
Even though I own premium compressor plugins, I still turn to my stock one regularly. It’s really that good!
While the stock compressors in DAWs are all different, they usually have a lot to offer. Research the compressor that came with your DAW. You can probably get a lot more mileage out of it than you expect.
9. Having too many plugins
This is another key reason to learn the ins and outs of your stock compressor before buying a premium one.
It’s easy to feel like you don’t have enough mixing plugins in your toolbox. You buy more and more until suddenly you have tons of compressors to choose from.
This might sound nice at first, but there is such thing as having too many options. The number of plugins to choose from can become overwhelming. Instead of focusing on your mix, you end up in gridlock, unsure which compressor to choose.
Save yourself a headache and some money by having one go-to compressor. Whether it’s your stock compressor or a versatile premium one, pick a compressor and really get to know it.
Different compressors can certainly add their own unique color to a track. But you can get a ton of different tones out of a compressor if you know how to use it.
Save time and energy while mixing by picking a compressor you like and learning all its ins and outs.
10. Sticking to analog compressors
Analog compressors and plugins that model them are definitely enticing. The long list of hit records the famous hardware compressors have been used on is enough to make any musician feel like they have to have one.
But there are a ton of incredible compressors out there that don’t just focus on recreating old classics.
Don’t get me wrong, I don’t have some sworn vendetta against LA2As. But when choosing a single go-to compressor, you’ll get more mileage out of a plugin that gives you plenty of tonal options.
The FabFilter Pro-C 2 is a great example of a versatile plugin that will give you plenty to work with.
And there you have it! Ten common compression mistakes to watch out for. Avoiding these mistakes will go a long way in making sure you have a professional-sounding mix every time.
Next up: The Ultimate EQ Cheat Sheet for Every Common Instrument
Rob Mayzes is a producer, mix engineer and founder of Home Studio Center, a site dedicated to providing valuable tips around recording from home studios.