 Image via Shutterstock
This article originally appeared on TuneCore.
For part one of this two-part series, click here.
What is an industry-standard recording?
After thousands of hours of research, I have formulated a workable definition for an Industry Standard Recording: Any recording which has been purchased or consumed by a large number of fans internationally, continues to be sold/streamed since it’s release, and is widely considered by fans to be a pleasing and emotionally moving recording.
The secret behind consistently creating your own industry standard recordings, is to locate commercially released industry standard recordings similar to the project you are working on, and use them as reference tracks while mixing and mastering (this process is known as A/B’ing) — not at the end of the project (when it’s too late).
By the above definition of an ‘Industry Standard Recording’, have there been examples of recordings which have been released internationally which were not considered to be industry standard recordings?
Yes.
Here’s one example that occurred in 2014. The recording? The soundtrack for the movie “Interstellar.” Here you have a recording that would not make a good reference track. Why? Well, let’s take a look at various headlines from major news outlets that started blowing up the internet following the premier of the film:
“Why ‘Interstellar’ Sound Issues Have Ignited a Hollywood Uproar” – Billboard Magazine
“Does Christopher Nolan’s ‘Interstellar’ Have Major Sound Mix Issues?” – Slashfilm.com
“Chris Nolan’s ‘Interstellar’ Audio Shot Itself in the Foot” – Forbes
Following the Slashfilm.com story, Hollywood-Elsewhere.com ran a story which included this statement, “The November 5th Slashfilm.com article about Interstellar’s bassy, soupy, dialogue-obscuring sound mix indicates that people are bitching about it all over the world.”
A similar situation occurred with the release of the record “Death Magnetic” by Metallica in 2008. You can read about the complaints regarding the mixing heard world-wide following the release of that record in this TuneCore article on the subject of mastering for home studio owners that I penned.
These are just two examples. There are more to be sure, but the percentage is very low compared to internationally released recordings which fans find to be pleasing and emotionally moving.
Question: How can top-tier professionals release major soundtrack and album recordings that do not strictly adhere to industry standards?
Here’s how: There are no exact industry standards for mixing music.
When I first discovered that fact I couldn’t believe it.
Before my career started to take off, when I was still struggling with my own amateur mixes, that was the one thing I was totally focused on discovering! EXACT Industry Standards for Mixing!
And that brings me to something I promised to share with you: a revolutionary music production ear training exercise. You’ll see in a minute how this exercise fits perfectly into this topic of EXACT Industry Standards for Mixing (or a lack thereof)
The exercise is called “Enlightenment,” and for good reason.
In order to carry out this music production ear training exercise (the first of 10 found on The Lucrative Home Studio Program), you’ll need to know something about A/B’ing in general.
I discovered that:
- any physical motion (such as clicking a mouse),
- any silence in-between A and B while A/B’ing and
- looking at the computer screen…
…will damage the integrity of being able to objectively compare A to B while A/B’ing. This is based on extensive research into psychoacoustics and sonic illusions. Pretty fascinating stuff. In other words if 1, 2 or 3 above are present, what you think you hear may not be accurate at all.
As a result of that research, I created a revolutionary way to A/B that can be done with no physical motion, no silence in-between A and B and with your eyes closed. This allows any person to objectively compare the exact differences between any two recordings, bypassing all sonic illusions and psychoacoustic phenomenon. You can set up this workflow two ways:
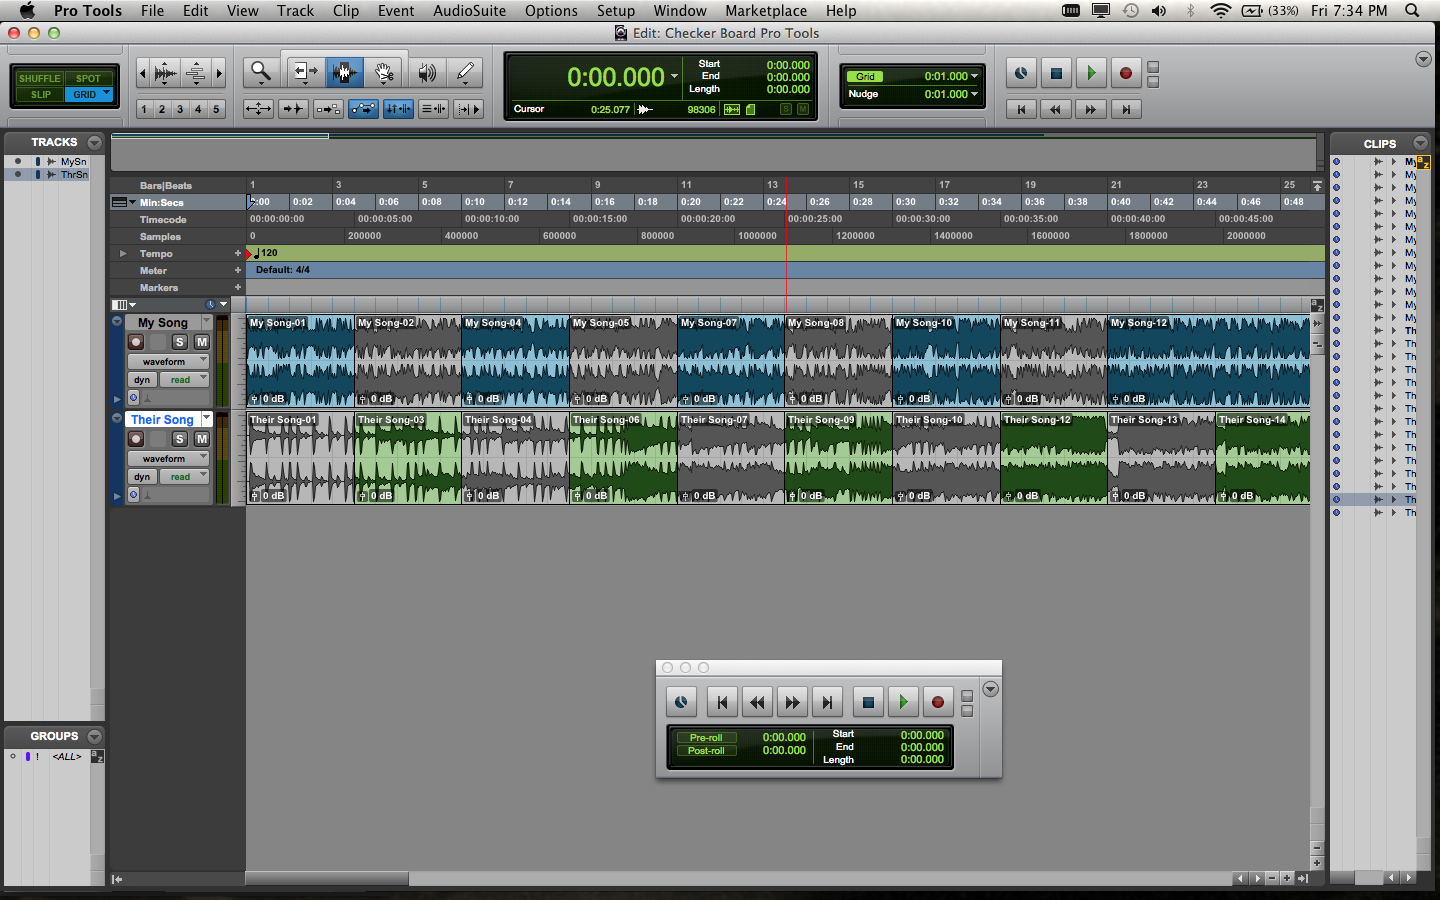
1. By placing audio files above one another on separate tracks in a DAW, highlighting those tracks, cutting those tracks every five seconds or two bars or so (using snap-to-grid), and muting the cut sections in a “checkerboard” fashion. One can then set up a loop, hit play, and sit on a couch or a chair WITH EYES CLOSED and LISTEN OBJECTIVELY to one recording compared to another recording. This A/B technique is most effective during the mastering stage.
2.) While MIXING, you can set up a session so that your reference track(s) are routed to an Aux Track (or Group Track or SubMix Track).
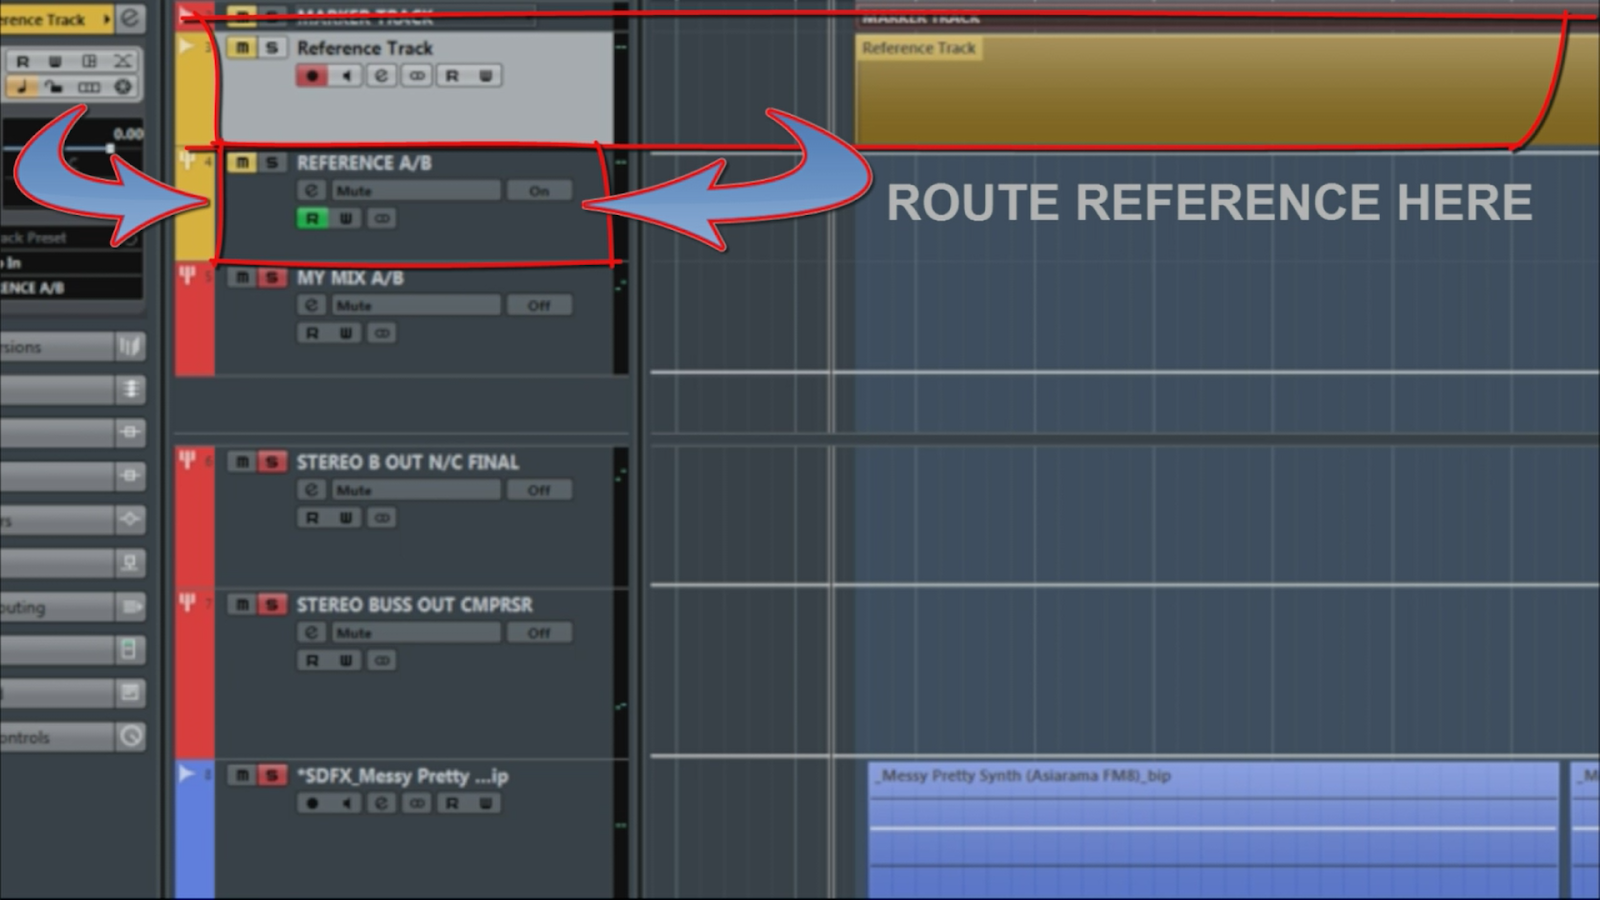
You then set-up mute automation (mute “on” and “off”) every five seconds or two bars or so on the reference Aux Track (or Group Track or Submix Track).
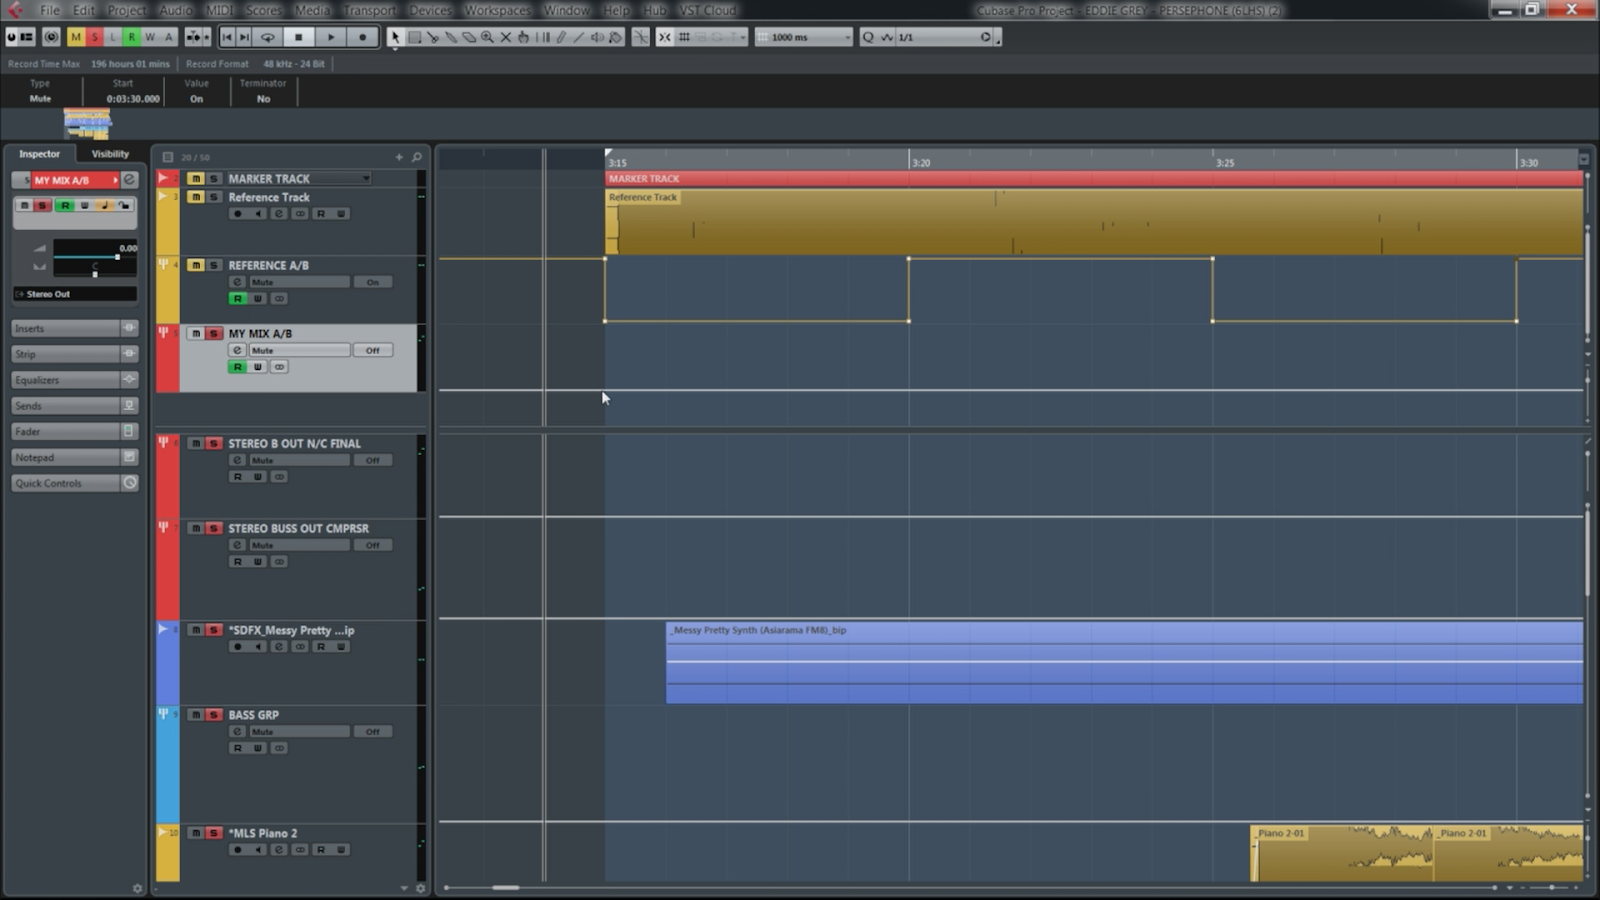
Now you route your Mix to a separate Aux Track (or Group Track or Submix Track).
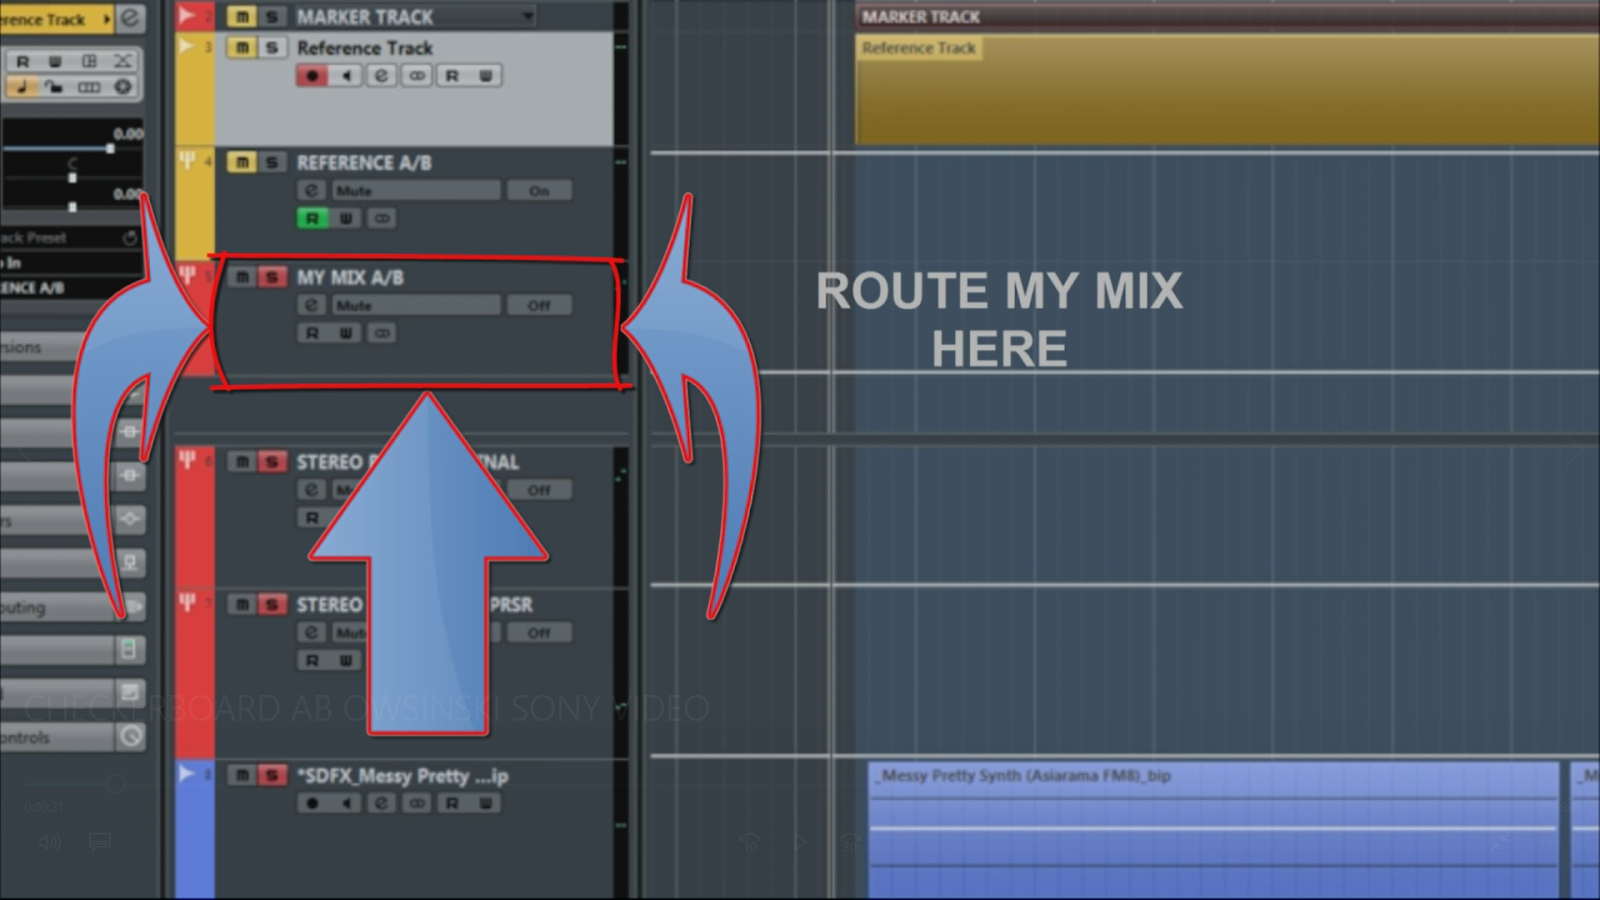
Set-up THAT track to mute and un-mute in a MIRROR IMAGE of your Reference Mute Automation.
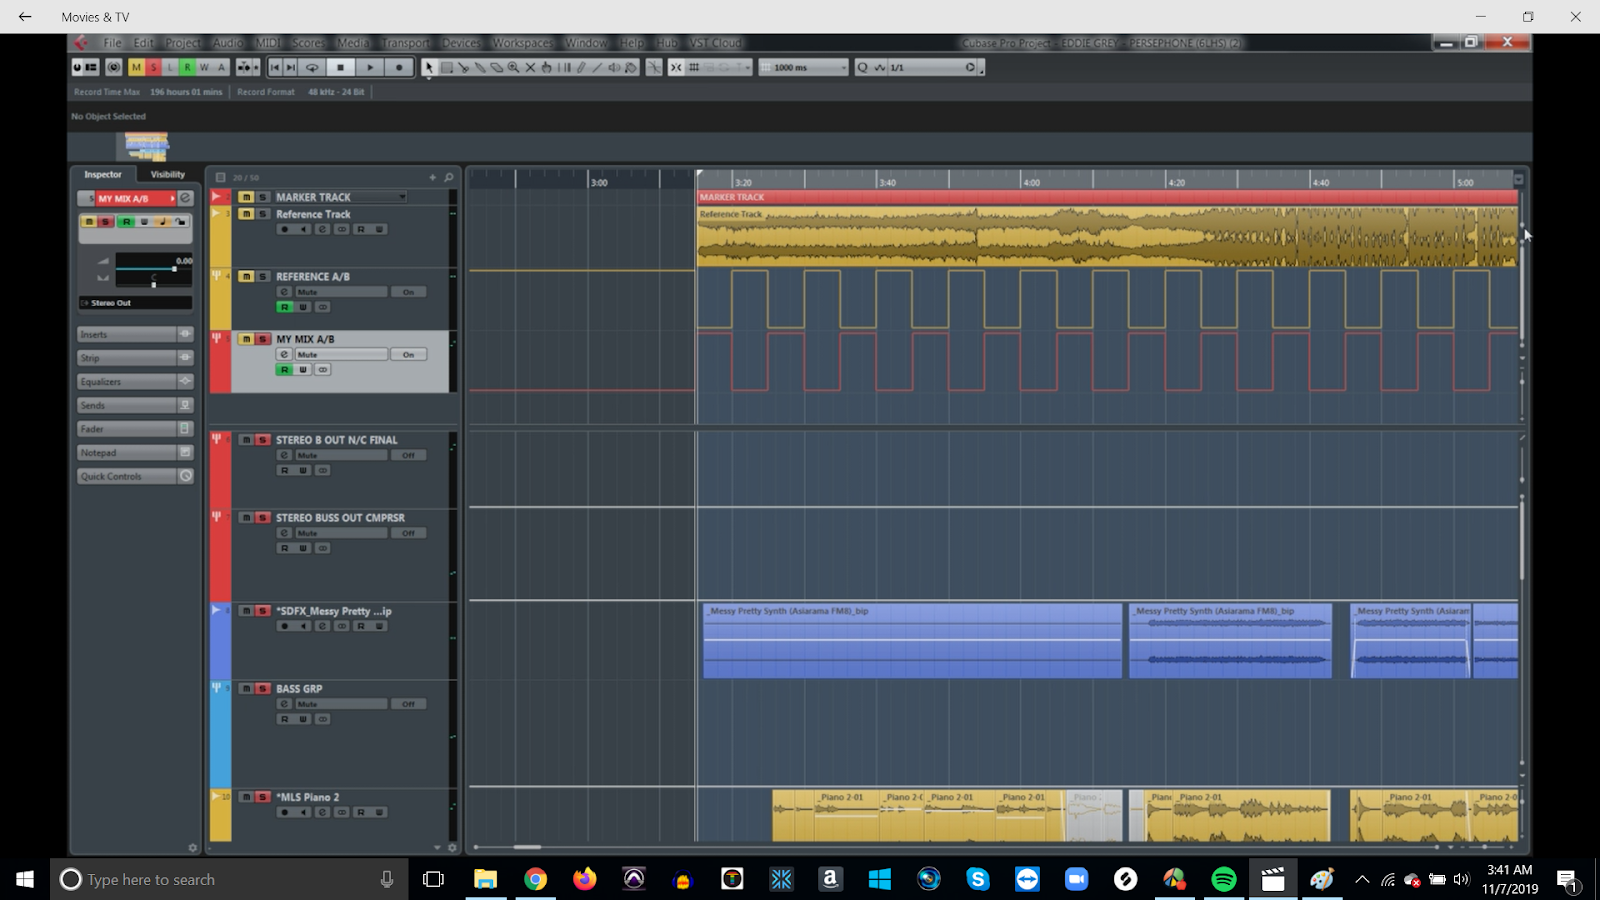
Then set up a loop. That way, you can hit play, close your eyes and A/B your mix to a reference track while in the process of mixing. The secret is to lower the volume of the reference track to the volume of your mix BY EAR — and shave just a little off of the low and high end EQ on your reference track, which, in essence, reverse engineers the commercial reference track back to its mixed state — giving you more of an apples vs. apples comparison.
OK, let’s get you set-up for Music Production Ear Training Exercise No. 1 “Enlightenment.” Here’s where we address the topic and the question of EXACT Industry Standards (or a lack thereof).
Using the approach described in number 1 above (using the cutting method of Checkerboard A/B’ing), do the following:
- Import 10 to 20 of your favorite commercially released recordings into your DAW, one each on a separate track.
- Highlight all the tracks.
- Cut the tracks vertically every five seconds.
- Mute the tracks in a “waterfall” fashion – meaning allow only one track to play, in order, every five seconds. Do not adjust the volume or any other parameter of each track. You may need to copy and paste each track to the right of itself to extend the playing time, in order to hear enough five second samples of each track.
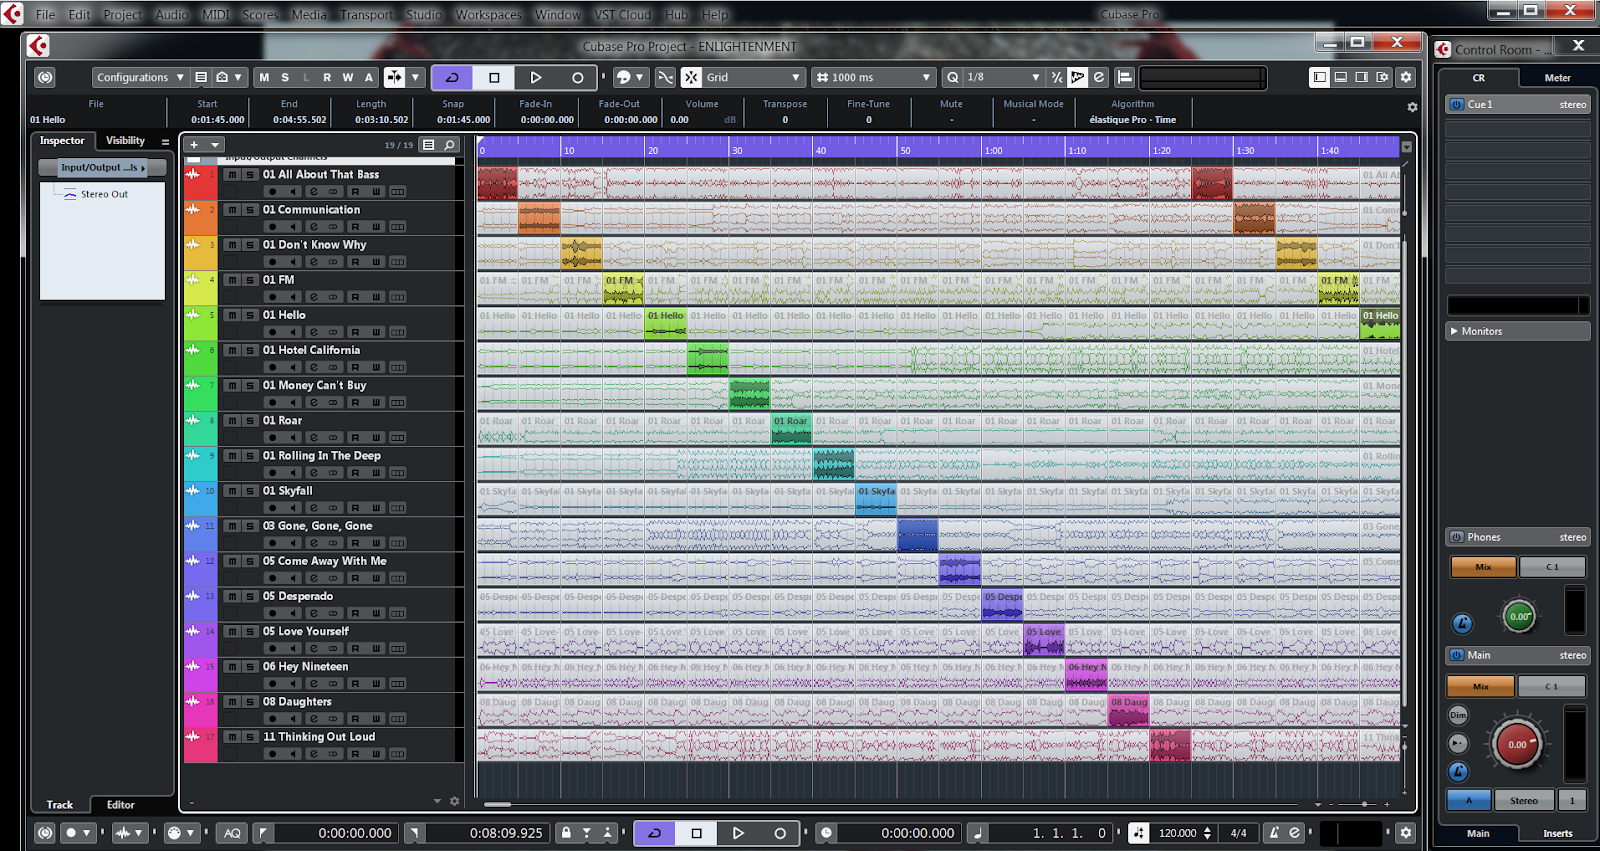
Now, export that track and listen to it over and over. Universally, here is what I get back in terms of reactions, feedback and lessons learned from this seemingly overly simple exercise:
“I had no idea that there were so many approaches to mixing! I somehow thought there was only one!”
You can see why I call this music production ear training exercise “Enlightenment” – I strongly suggest you do this exercise. The sooner the better.
So, when I say a much better goal than trying to get your mix to sound great in every system is to consistently create Industry Standard Recordings, what I’m saying is that there are curbs on the side of the road, but the road is a bit wider than you might think (the standards are not so exact). As long as the MUSIC (song or composition) and the PERFORMANCES are outstanding, you will find that the production is much easier to approach and to polish: WHEN YOU EMPLOY THE TECHNIQUE OF A/B’ING EFFECTIVELY.
Now, I definitely mix in different systems, but I’M NOT COMPARING THE SYSTEMS. Here’s how I mix in different systems. I use what is known in other industries as The Scientific Method. The Scientific Method basically says that you need a “control” with which to compare everything you are doing. A “control” is something that doesn’t change. Well, the systems definitely change, one to the next. Me adjusting my mix as I work is definitely a change. So what, then is the right “control” to use for mixing in different systems?
Your reference track! That is your “control” in The Scientific Method approach to mixing and mastering. Yes, you should definitely test your mix in various systems. Again, it’s not by comparing systems and how your mix sounds in the various systems.
What you do is compare your mix to your reference track(s) in each system. In other words, you simply A/B in each system.
I found the best way to do this is to actually mix through various systems, rather than export my mix and then A/B in various systems. I have my studio set-up where I can A/B WHILE MIXING through my studio monitors, through a laptop (you can learn SO MUCH about your mix through laptop speakers it’s not funny), through a smartphone, through some cheap computer speakers, etc. All with a simple switching system.
The bottom line is this: While listening through laptop speakers, If the reference track sounds a little weird in the mid range, and if your mix sound the same kind of little weird in the mid range, good. No need to adjust anything. It’s the system that’s creating the weirdness, not your mix!
In this case you’d leave your mix alone. If the reference track has a clear and punchy kick and bass in the laptop speakers, but your track has hardly any kick and bass in the laptop speakers, you have some work to do. And so it goes in each system. You don’t care about the system, you care about the comparison between your mix and the reference track.
Using the comparison to painting, here is what it would look like visually:
Comparing a reference track (left) to my mix (right) in my studio monitors. Comparison is good:

Comparing a reference track (left) to my mix (right) in my laptop speakers. Comparison is good:

Comparing a reference track (left) to my mix (right) in my smartphone. Comparison is good:

And now the final trick that will blow you away and take your mixing to a whole new plateau:
Once you have set up your mix with Mute Automation, export that mix (five seconds of your mix, five seconds of the reference trick, five seconds of your mix, five of the reference, etc.) AND also export your full mix from beginning to end. With those TWO exported files in hand, you can now go to your car and hear things in your mix you never dreamed you’d be able to hear. With the “Checkerboard A/B” File, you’ll have “x-ray hearing” and will know EXACTLY where you stand compared to industry standard production.
With your full mix, you’ll be able to listen for emotional weak links, per my definition of a finished track: “No emotional weak links for the listener, from the very first note to the last moment of silence.” You’ll be able to much more easily get your mixes consistently up to industry standards. Remember, you’re not trying to necessarily MATCH the reference track(s), you’re simply comparing where your mix stands — in real time, to a commercially released track.
Note: In the mixing process, you adjust the reference track down to the volume level of your mix by ear. In the mastering stage, you get your mix up to the level of the commercially mastered reference track. In the mastering stage, you don’t change the volume, the EQ or any parameter of the reference track.
Here’s to improved mixing and mastering! You can do it!
Next up: How to Choose the Perfect Recording Studio for You
Gary Gray is the teacher behind the Lucrative Home Studio online course. He’s an award winning composer, producer, and engineer, and has produced multiple projects for 20th Century Fox, Disney, Hollywood Records, A&E, EMI, CBS and many others in his home studio.