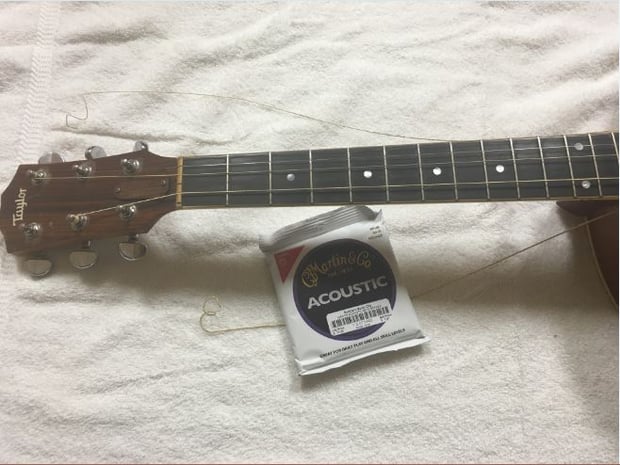
 All images by Matthew Wendler
Chances are if you're reading this blog, you already know how to restring a guitar. It isn't a very hard task, but I've seen some poor technique in guitar restringing from experienced guitarists before. Guitarists who restring their guitars well are often reliant on expensive and unnecessary tools. Even if you prefer to use tools, you could find yourself in a scenario where you're forced to go without them. Use this simple method if you're looking to ditch the tools and restring your guitar like a boss.
Step 1: Set the string
Set your string to the bridge. This Taylor has a fairly straightforward bridge. If your guitar has a floating bridge, you'll have to take care that it doesn't move while you're restringing. The important thing is to be sure that the string is fastened to the bridge by whatever mechanism your instrument uses. Once it's fastened, lace the string through the correct spot on the nut.
Step 2: Measure
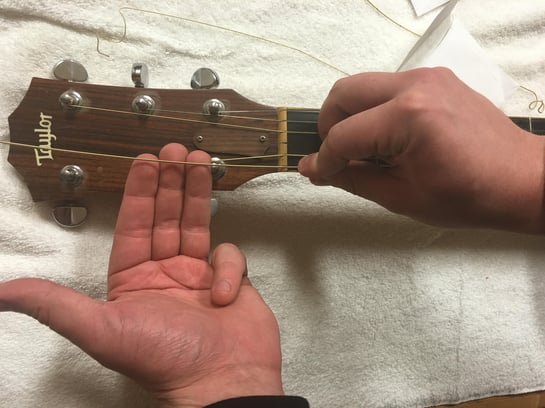
Pull the string so that it's flat against the neck, then use your fingers to measure it past the head's peg. I mark the string at about three finger widths. If you have small fingers, you may need to go closer to four finger widths.
Step 3: Two folds
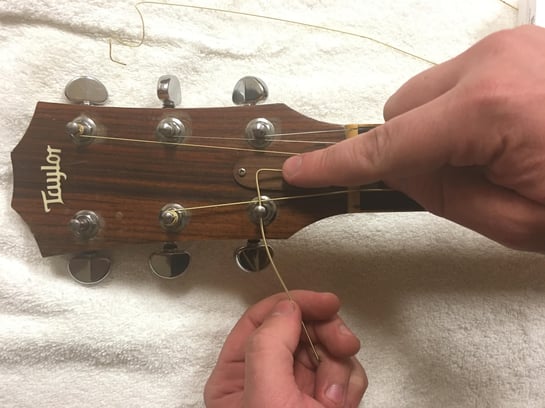
Fold the string at the spot you measured. You want it to be at a 90-degree angle. Run the tip of the string through the hole in the tuner. Set the fold in the string against the hole in the tuner. Make a second bend in the string on the opposite side of the tuner so that it goes up and away from the head of the guitar. This will allow you to make a better coil when you put the string on.
Step 4: Tighten
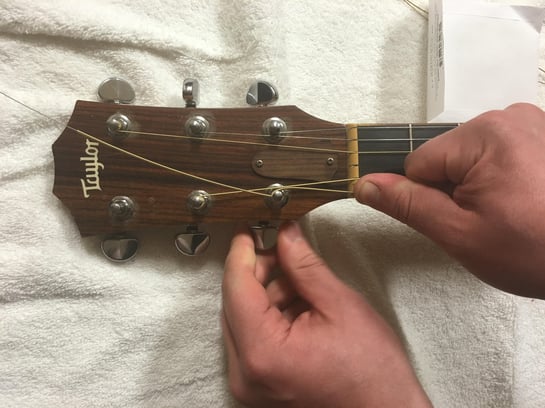
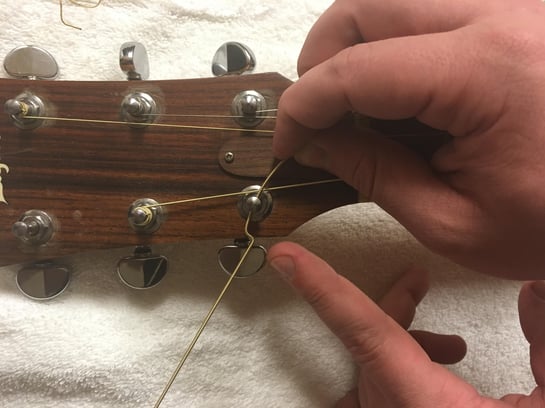
I like to tighten the string by hand. Make sure you're turning the tuner counter-clockwise. While you're doing this, keep the string taut by holding it down against the nut with your free hand. As you tighten, the folds you made in the string previously will make the string wind neatly down the tuner's peg. It's very important to keep the string taut with your free hand; if it's too loose, then you won't get a nice, tight wind around the tuner, and your guitar will go out of tune easily.
Step 5: Cut
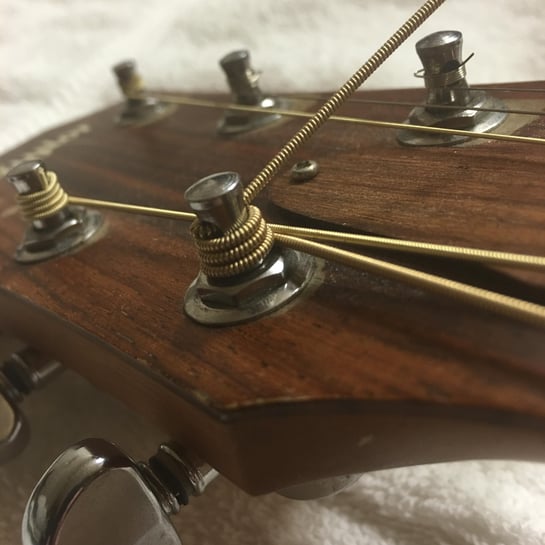
Once the string is roughly in tune, you can feel free to cut the excess length. Be sure that you end up with a nice tight coil as pictured above. I tend to wait until I've completely restrung the guitar for this step. It also doesn't hurt to keep the strings uncut and leave the guitar alone for a short time after you restring it. New strings may take some time to stretch out, which will make it difficult to keep the guitar in tune for any length of time. Of course, if you're changing strings in a hurry, that may not be an option. Either way, at some point you should cut the strings. This is the only step that you'll need to use some kind of tool for.
This restringing technique was taught to me by a guitar technician some time ago, and I've never had a problem with strings since. Haphazard restringing, or strategies such as tying knots around the tuners, result in strings that either fall out of tune or break too easily. With this method, you get the most effective way to stay in tune as well as the most strength possible out of the strings.
Matthew Wendler is a blogger and multi-instrumentalist from New Jersey. He specializes in guitar, bass guitar, and bagpipes, and is passionate about writing both professionally and for enjoyment. His personal blog can be followed on Twitter at @ymiatvmi.


