Everyone is on Zoom nowadays. From webinars to happy hours, Zoom has become the hot spot for not just business meetings, but also collaborations and social calls.
But did you know that Zoom is one of the best options out there for music lessons, co-write sessions and live shows as well?
While the sound quality of a live stream will never be lossless in the foreseeable future, Zoom’s computer audio share feature stands out among its competitors. If you want to continue your musical activities remotely, you might want to explore what this program has to offer.
All participants can share their screens simultaneously.
Sharing your computer screen can be extremely useful if you teach music production or want your co-writer to be able to brainstorm with you while you’re working on the lyrics of a song together.
When you download the Zoom app on your computer and open an account, even if it’s a free account, you’ll see that one of the main actions listed is “Share Screen”. Click on the arrow next to it, and you’ll see the option to share computer sound, too.
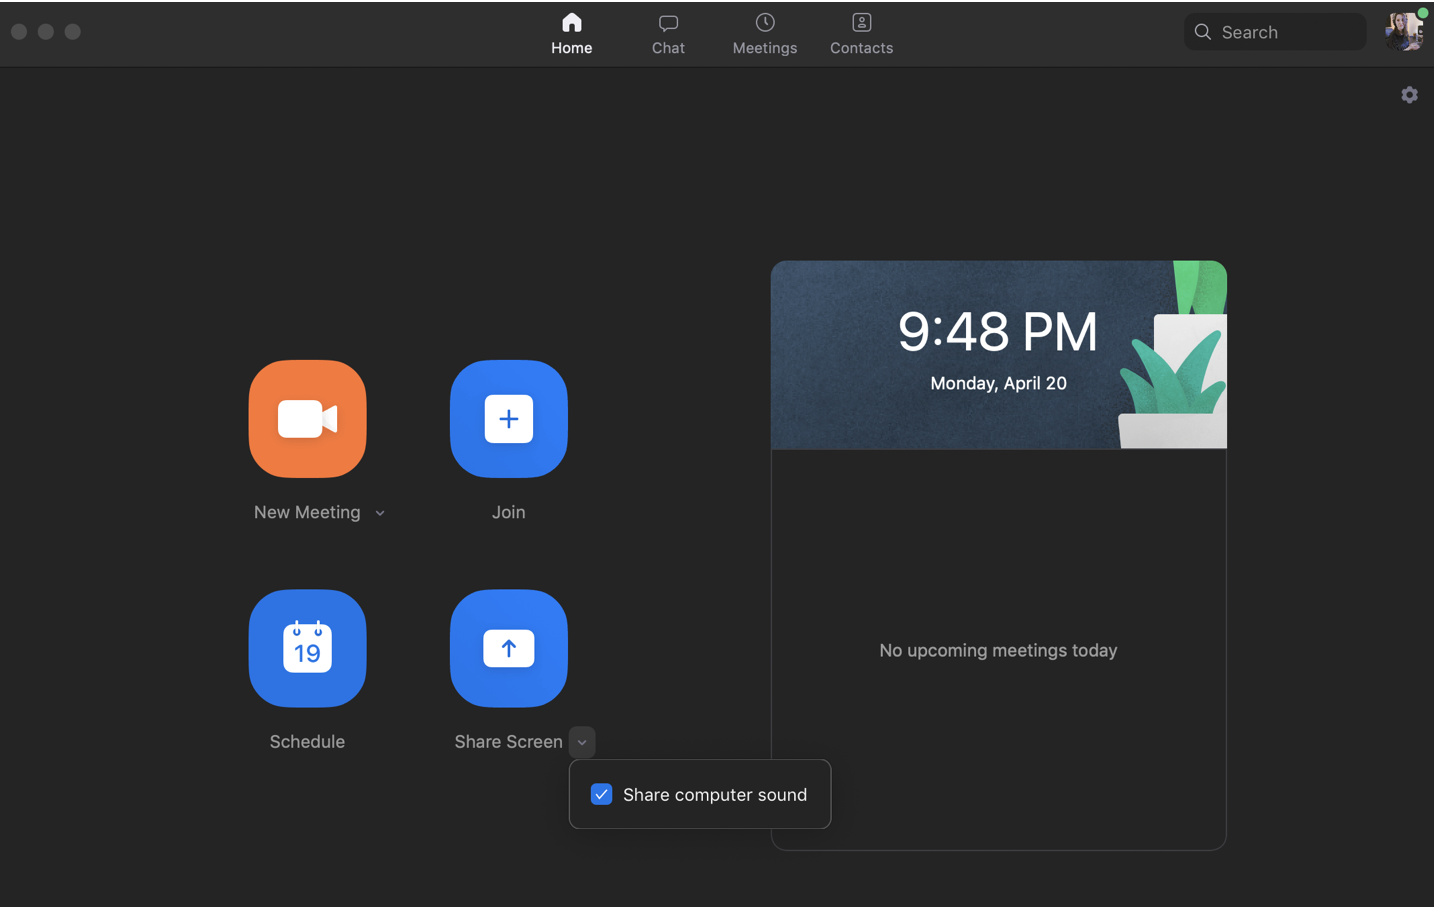
But you’ll be able to see everything laid out more clearly when you set up a new meeting or join a call.
If you’d like to talk into your microphone while also sharing the audio coming out of your computer, first, you’ll have to share your screen.

Once you click on the Share Screen button, you’ll have a few options. No matter what you choose, just make sure that you check the “Share computer sound” box at the bottom left, and the participants should be able to hear the sound coming out of your computer.
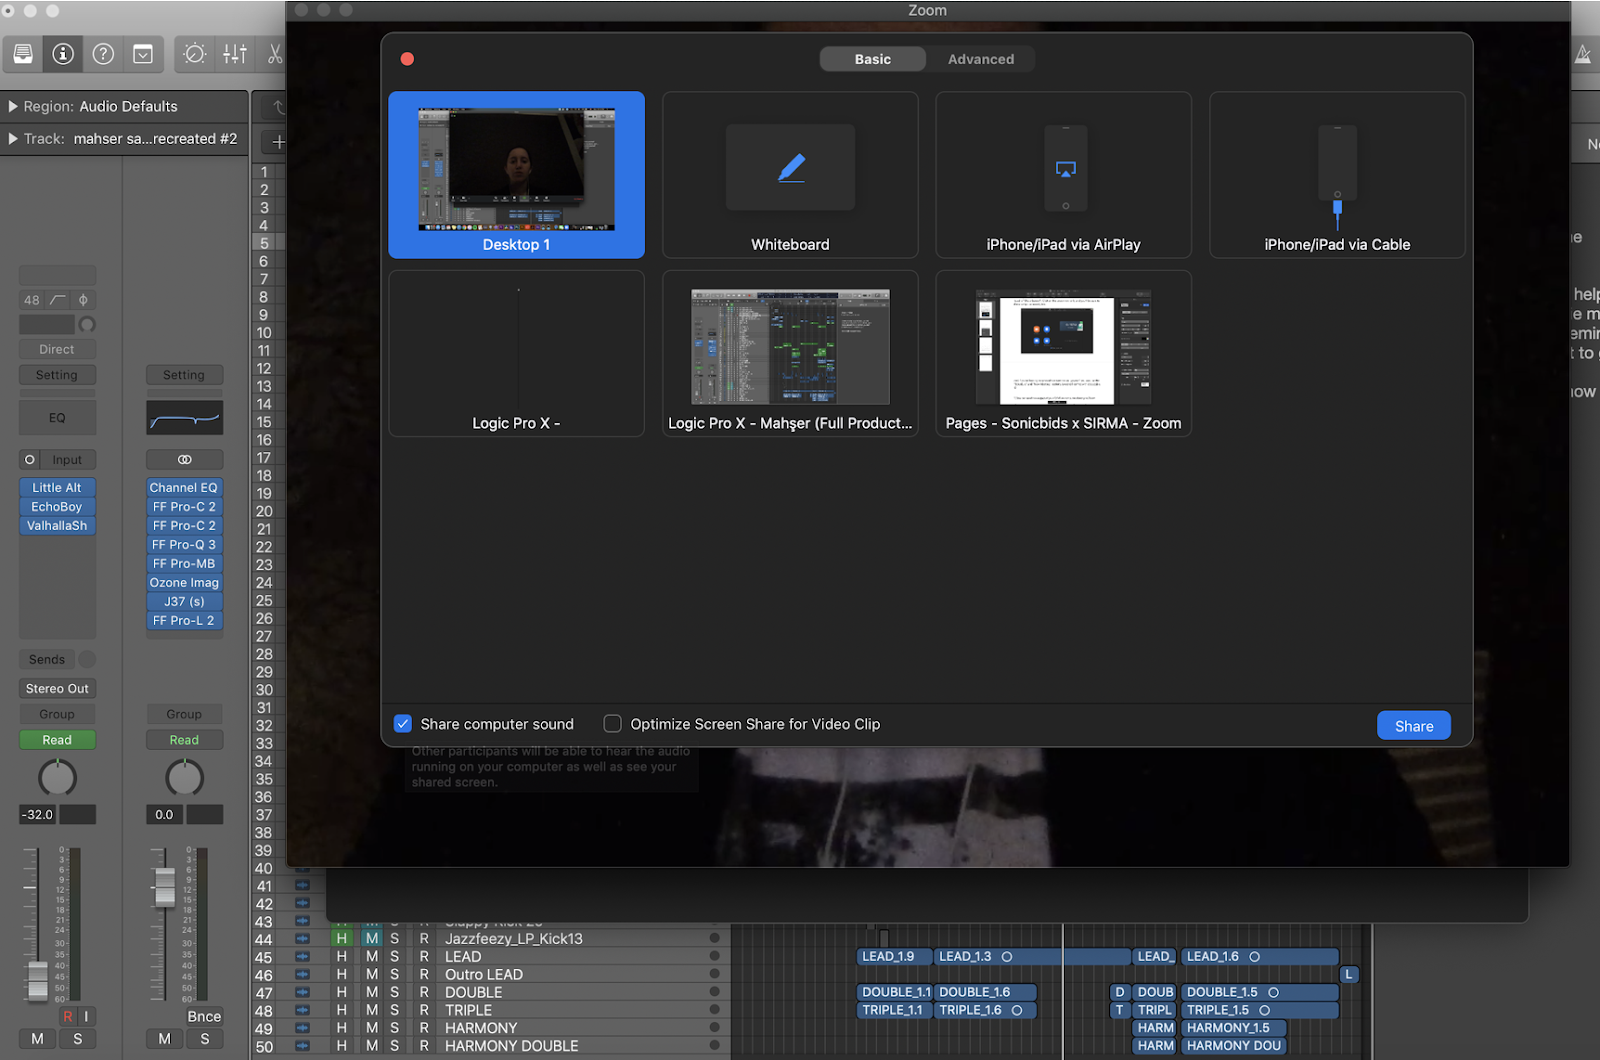
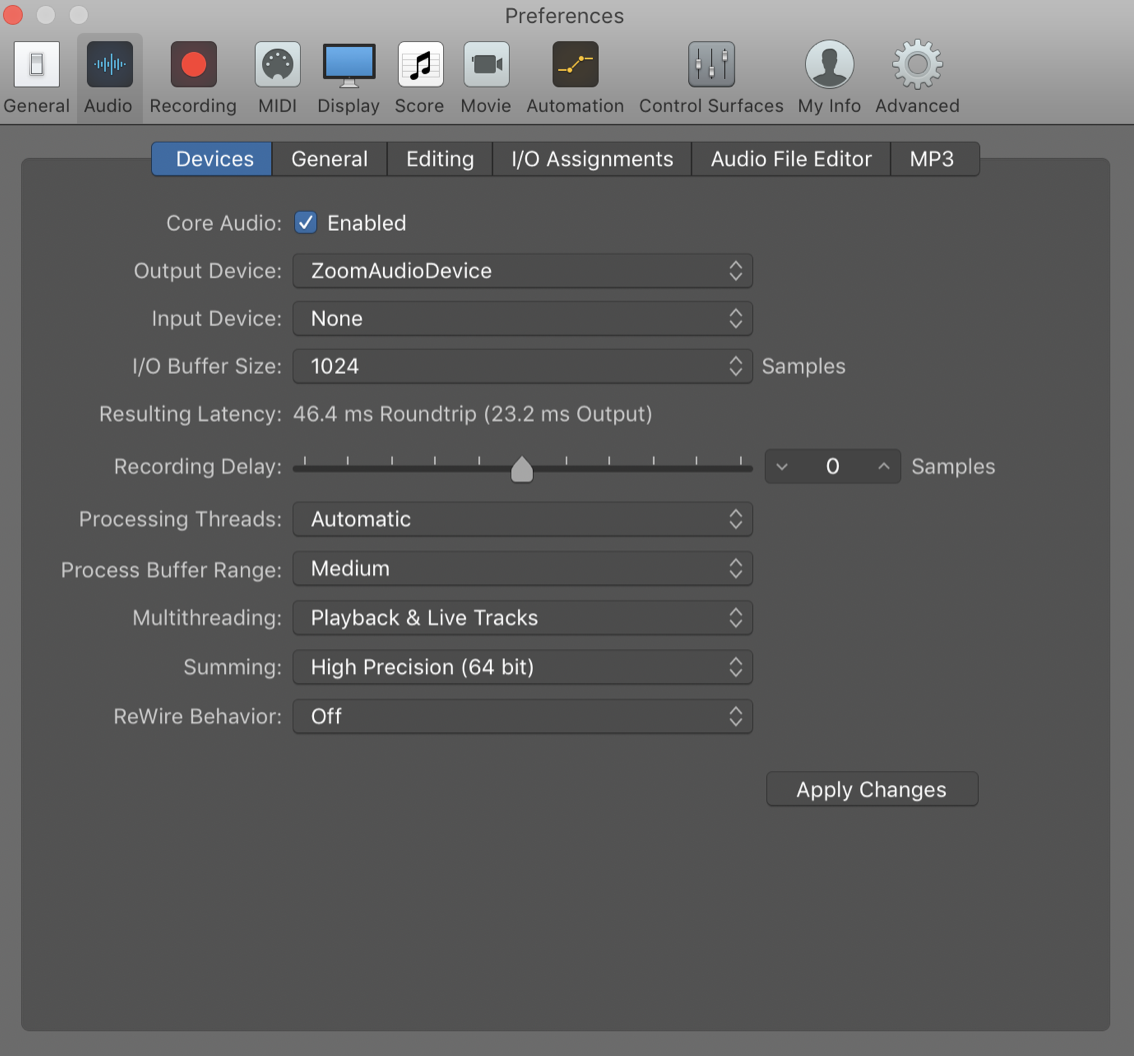
2) You can send the output of your DAW or computer directly to Zoom.
Let’s say you have selected the “Share computer sound” option but the participants can’t hear anything coming out of your computer other than your voice.
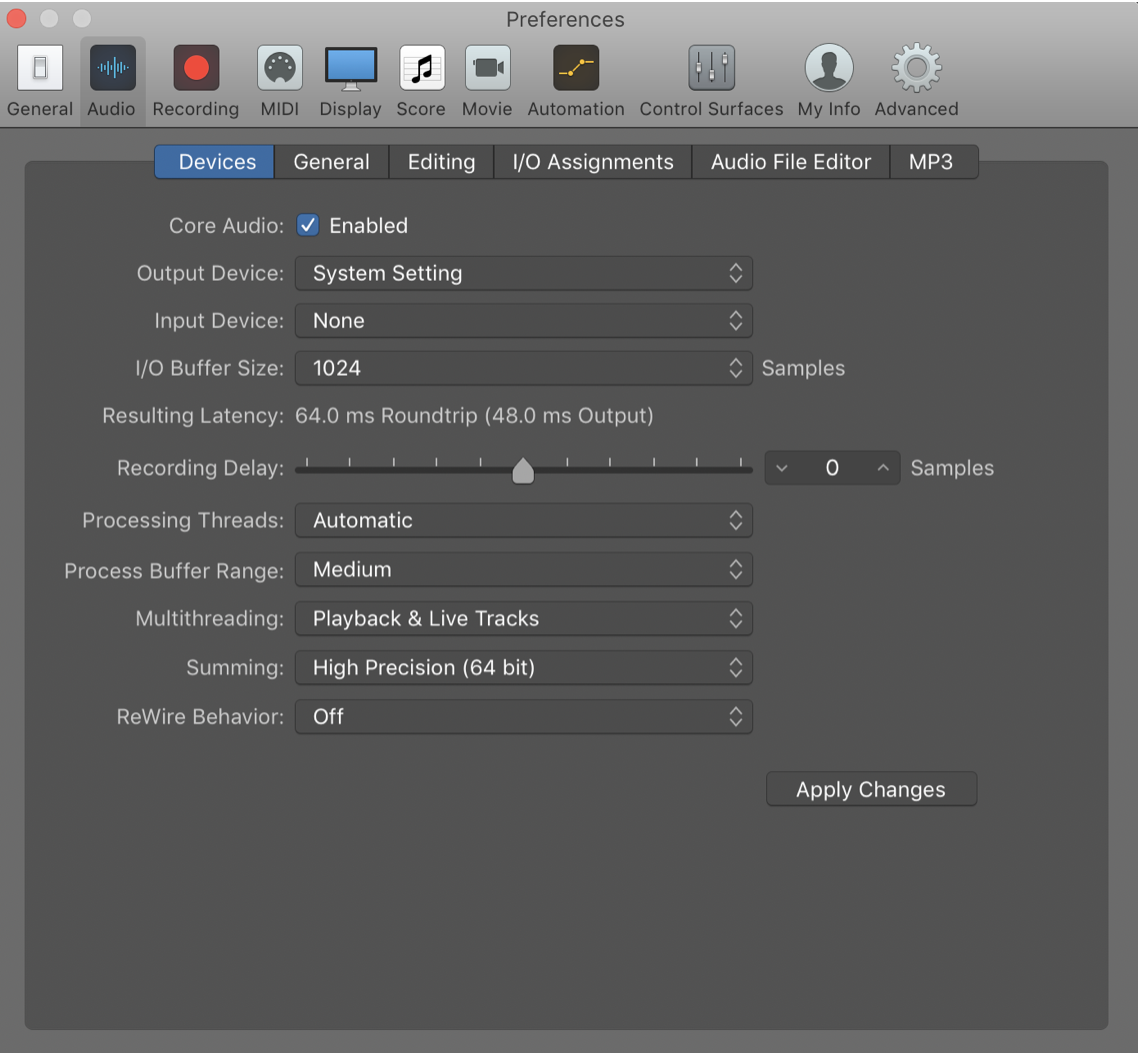
There might be a few reasons as to why that might happen, but if you’re looking to share the audio from your DAW only, the easiest way to solve this problem would be to select the ZoomAudioDevice as your Output.
Keep in mind that if your computer’s output has been routed to internal speakers, selecting “Sytem Setting” as your DAW’s output will also get the job done.
3) All participants can talk while playing music out of their respective DAWs at the same time, without major latency issues.
This is what sets Zoom apart. While other programs like Google Meet and Skype come with screen share features, Zoom is currently the most commonly used program out there for sharing audio in real time. The video and sound quality very much depends on your connection, but the results are respectable to say the least. For those situations where you want to co-produce a track in private, Zoom is perfect, because both you and your partner can share computer audio as well as your screens simultaneously.
As a musician who teaches songwriting and music production, ever since I started using Zoom, my need to record tutorial videos for my students has significantly decreased, because…
4) You can record the video call in mp4 format and download it on your computer at the end of the meeting.
For those who purchase the paid plans on Zoom, it’s possible to upload the videos on cloud storage as well. But even if you’re using the basic plan, you can still record and stop recording at any point during the call, and save the file permanently on your computer as an mp4 file.
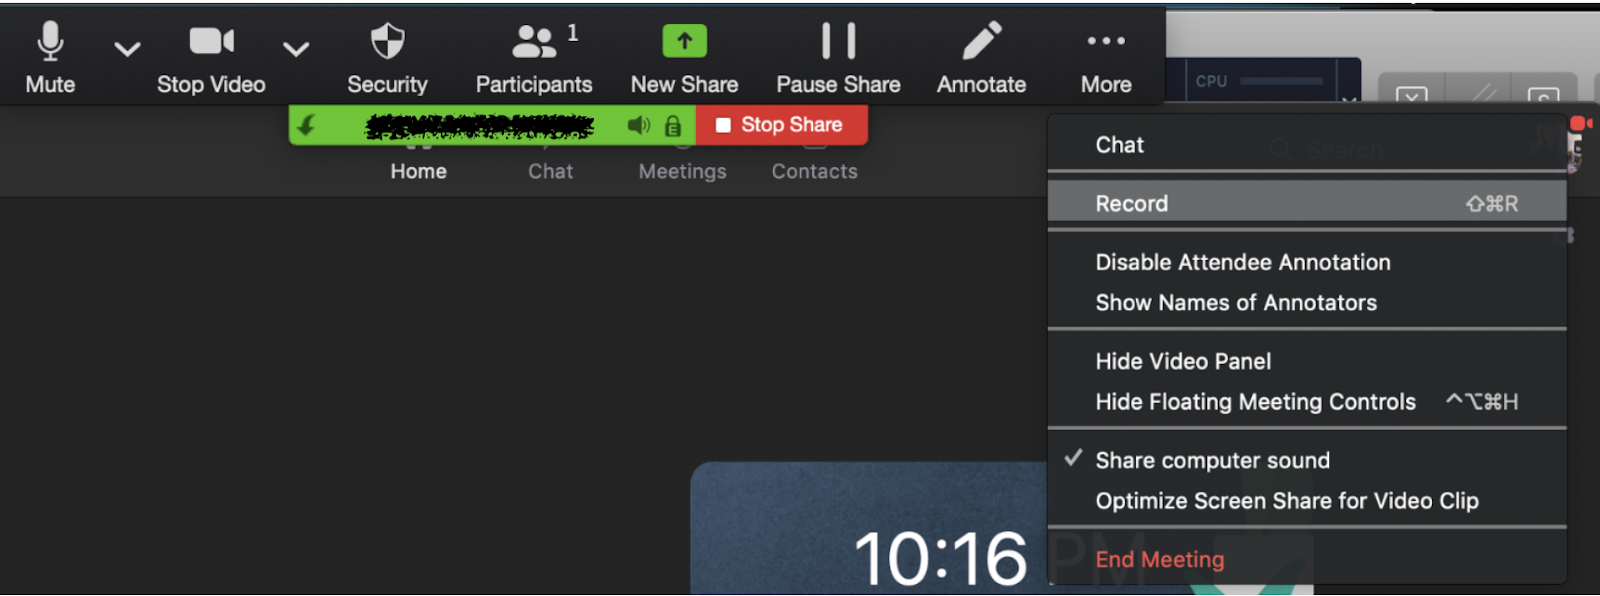
Such a time saver! If you’re interested in teaching via Zoom, be sure to give this a try. I’ve found that giving students the option to record lessons helps their progress immensely. Great for group lessons, too! Which brings me to this…
5) You can host private meetings with your students, collaborators or fans.
While some artists prefer staying in touch with their fans via a dedicated phone number nowadays, Zoom is great for those who want to host a one-time or recurring event through a disposable invitation instead. You can have up to 100 participants on a Zoom call even if you have the basic (free) plan.
When you click on “New Meeting”, and then click on “Participants” at the bottom of the window that will open up, you’ll see the option to copy the invitation for your call. When you click on “Invite”, you’ll be able to “Copy Invitation” and email it to all the participants at once.
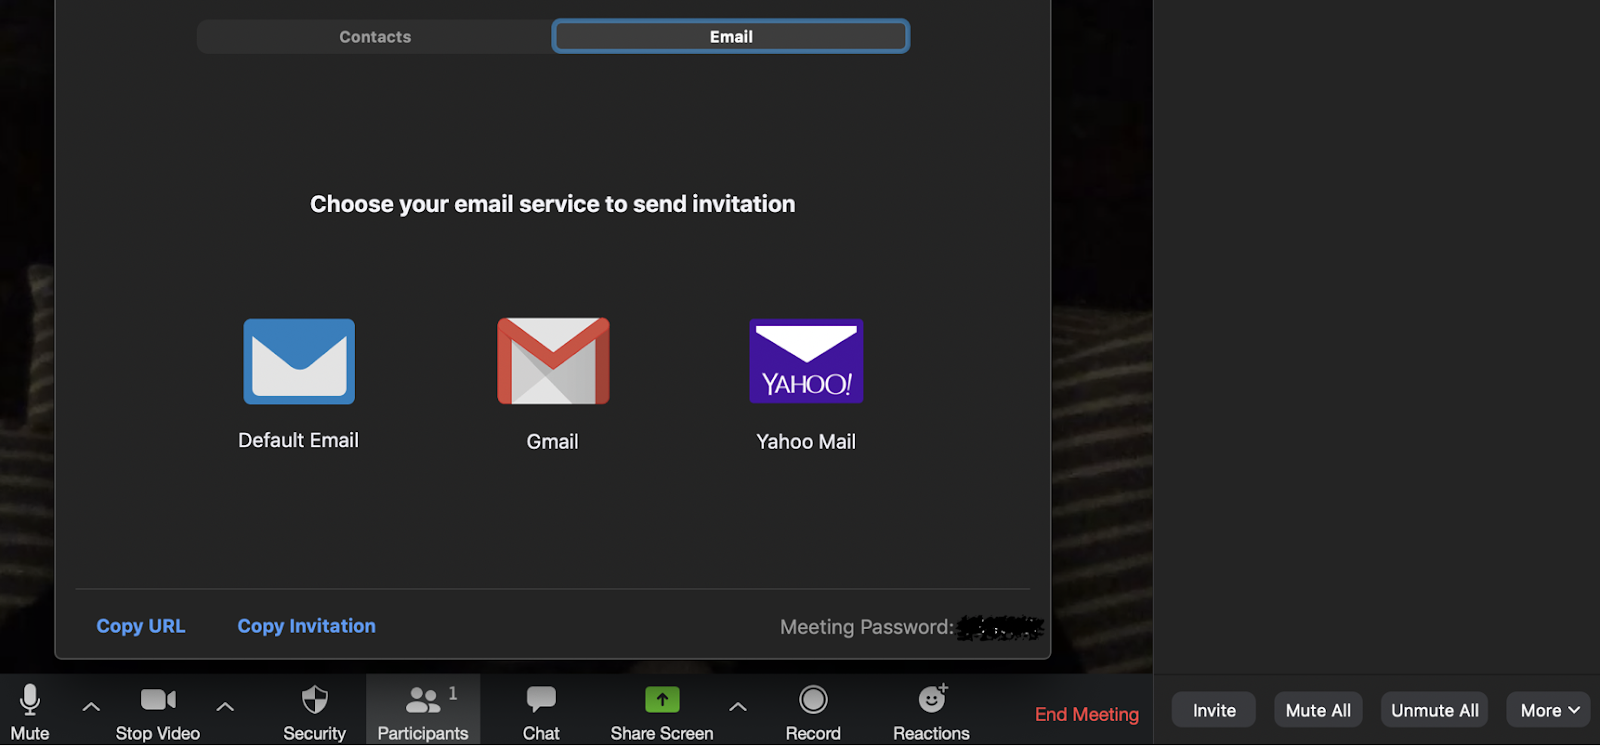
It’s worth keeping in mind that there’s a 40-minute time limit on group meetings, unless you sign up for the Pro, Business or Enterprise plan.
6) You can control what each attendee can and cannot do, which is useful for when you want to play a live show or host a small webinar.
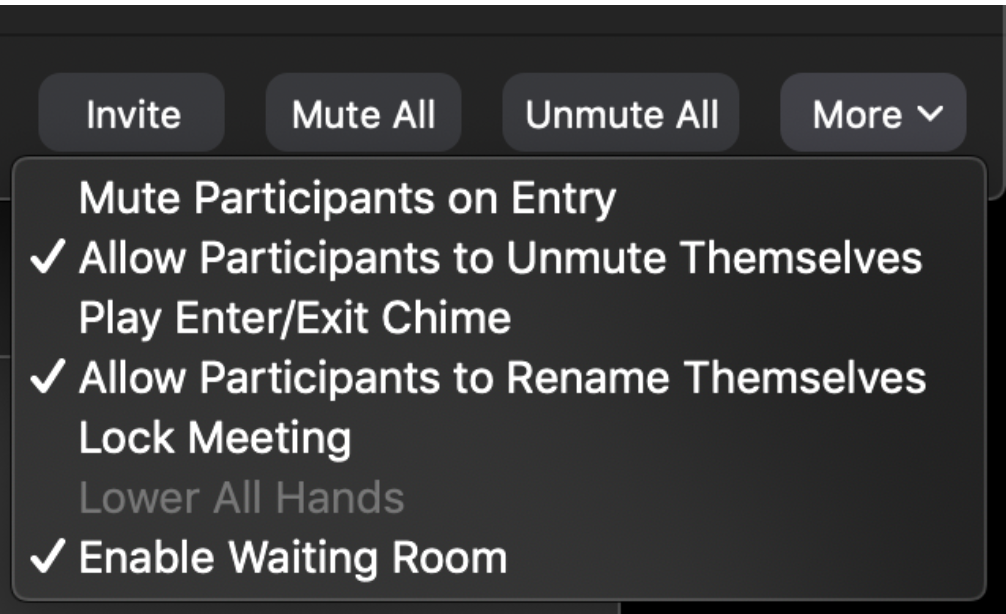
As you can see in the image above, at the bottom right corner, there’s a tab titled “More”. By clicking on this drop down menu, you can mute participants on entry.
You can also decide whether one participant can share at a time as opposed to multiple participants sharing simultaneously, by clicking on the arrow next to Share Screen.
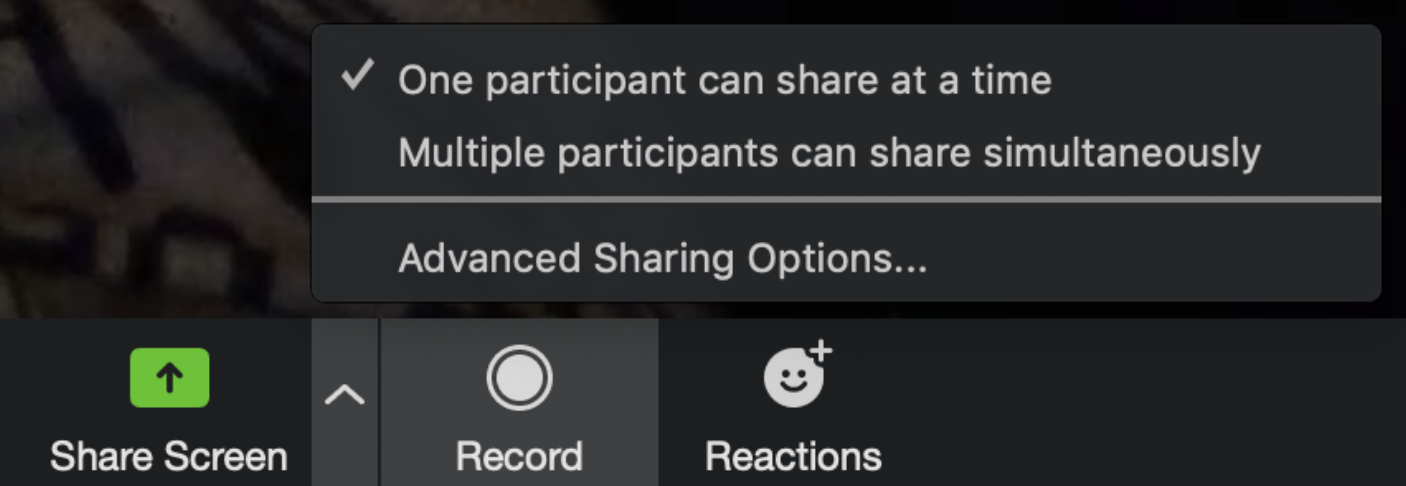
If you’re looking to use Zoom for a truly uninterrupted concert experience, my advice is to run a test call before you embark on your live set. There are so many options, but one way or another, you’ll be able to find what suits your specific needs through trial and error.
7) You can also host paid webinars and live shows on Zoom.
Zoom comes with a PayPal integration, which makes it a practical option for monetizing live shows and webinars. However, video webinar is currently offered as an add-on starting at $40 per month, which cannot be combined with the basic plan. If you’re looking to give webinar a shot, you might want to request a demo from Zoom first.
***
SIRMA is an independent singer, songwriter and producer. She’s the creator of the Modern Pop Vocal Production course on Soundfly and has a degree from Berklee College of Music.

