 Image via Shutterstock
You asked, and you shall receive, Sonicbids blog readers. Per multiple requests, here's my guide to, "When the hell do I start turning these knobs, and where do they go?" But before we begin, I offer you the fine print: These references are general ideas for where to begin to look for sonic issues with particular sounds, instruments, and voices. I'm not going to tell you "always notch this 9 dB here and add 3 dB here with a wide boost and, voila, perfect sound!" because it's unfortunately just not that simple. So before you message me, "Aaron, I notched out so much 250 Hz out of my snare, I snapped the knob off the console, and it still sounds muddy!" just know that not all sound sources are created equal.
Sometimes a guitar cab gets mic'd up differently night to night, plus every voice is unique, and every snare drum "speaks" differently (just ask a drummer). All of these minute changes and differences can and will affect the EQ decisions you'll have to make. This is why I'm such a strong believer in ear training and learning how certain parts of the frequency spectrum present themselves outside of their source-specific applications. That being said, these tips can be helpful as a place to start your search, but are not gospel by any means. So without further adieu, let's begin.
A subtractive approach to EQ
Not everyone's ethos on EQ is the same, and most people may never see eye to eye on EQ approach. That being said, I come from the camp that subtractive over additive tends to be better for your mix in most cases. Now, I'm not saying to live in a strictly subtractive world; I do make boosts from time to time when needed or appropriate, but it's probably a 3:1 or 4:1 ratio of cuts to boosts.
Also, a quick note on the topic of high pass filters: use them. They can be your best friend, but be careful as they're a double-edged sword. HP filters can quickly clean mud from your mix and open things up, but too much can lead to a thin, weak-sounding mix equally as quick. When applying them, I like to come from the top down, as I find that easier to dial in properly. By that, I mean instead of rolling up an HP filter and listening until I think it's removed what I'm looking for, I start way above with "too much" HP filtering and roll it down until I feel that I have all the information on the bottom I need. I find it easier to hear the effect this way, which therefore allows me to more accurately and effectively control my low end.
Here's a detailed, instrument-by-instrument guide to EQ.
Drums
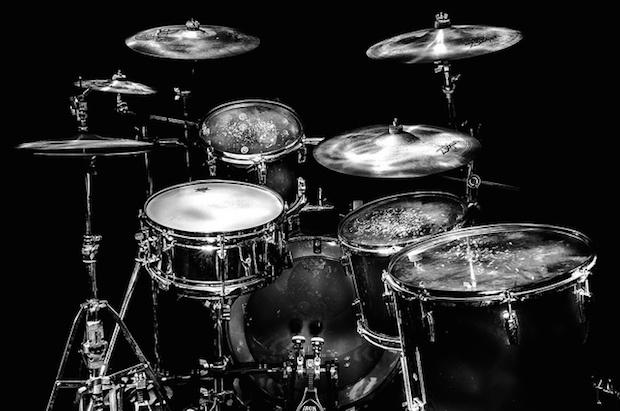
Image by Danny Sheppard via Flickr / CC BY-NC-ND 2.0
Kick
While the snare may arguably be the most vocal drum in the kit, the kick has an amazing array of possibilities for tonal shaping. In many ways, I think you can really measure an engineer/mixer's abilities on how a kick sounds and how it sits in the mix.
- 40 to 60 Hz - Bottom: The tone of the reverberation in the shell, sometimes too rumbly, can be undefined/indeterminate depending on the mic'ing/speakers
- 60 to 100 Hz - Thump: The "punch you in the chest" range of the kick
- 100 to 200 Hz - Body: This is the "meat," if you will, of the kick sound
- 200 to 2,000 Hz - Ring/Hollowness: This large band is where you can often find issues with ringing and muddy kick sounds
- 2,000 to 4,000 Hz - Beater Attack: This is the range to look for the "thwack" sound of the beater, critical for getting that "basketball bouncing" kick sound
Snare
- 200 to 400 Hz - Body/Bottom: The central fundamental of most snares tends to live somewhere in this range
- 400 to 800 Hz - Ring: This is the range that tends to give that hollow "ring" to a snare tone that's often undesirable. Crush this range too much, though, and your snare will start to lose some life and sound two-dimensional in the mix
- 2,000 to 4,000 Hz - Attack: The stick on head "crack" is often found around 8,000 Hz (Sizzle and Snap). The overtone sound of the snares themselves can either be accented or dampened somewhere around this point
Toms
- 100 to 300 Hz - Body: Depends on tuning, but a good place to look for the "boom" of a tom sound. Too much and things will sound, well, "boomy." Remove too much, and your toms will sound like cardboard boxes
- 3,000 to 4,000 Hz - Attack: Just as it sounds, this is the the attack of the drum itself from a stick on its head
Cymbals
- 200 to 300 Hz - Clank: Here's where, especially on your hi-hats, the "chink" sound of the cymbal lives. As always, season to taste
- 6,000 Hz and up - Sizzle: This range is where the "tssssssss" part of the cymbals can be brightened up to add some more life and "air" to a cymbal wash, or you can spontaneously start bleeding from the ears if used without prejudice
Synth "Kick" (808)
Ah yes, the 808. It's often used and referred to as a kick, but it tends to act more as a very low tom, as it has a pitch. This thing is the Loch Ness Monster – there tends to be more under the water. The best way to deal with a true, clean 808 sample is to work around it. It's usually best to let the 808 do its thing and to get the bottom end around it the hell out of the way. If it's a fuzzy sample or has been driven and squashed, you may need to play with things above 250 Hz, but usually live and let live is the best approach.
Bass
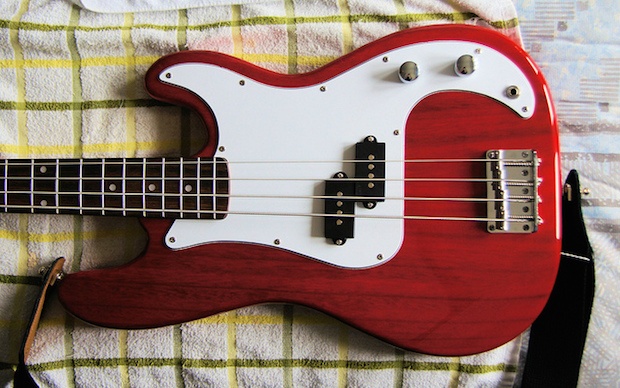 Image by Mike Sandells via Flickr / CC BY 2.0
The reason the kick and the bass tend to be mortal enemies in many mixes is they can literally occupy identical sonic space from a frequency perspective. So before reaching in with any EQ, listen to both and decide where one will take the lead over the other, and in which ranges.
- 40 to 80 Hz - Bottom: Especially with five-string variations, this is where the bottom resonances of most basses live
- 80 to 200 Hz - Fundamentals: The primary fundamental of the bass. Right around 180 to 200 Hz is where you can try to cut in on a bass that is too "boomy" to clean it up while preserving fundamentals
- 200 to 600 Hz - Overtones: These are the upper harmonics of most bass tones, depending on the sound you're interested in. If you're having trouble getting a bass to cut through in a mix, especially a low-end heavy one or one that's getting played back on smaller speakers, this can be where to look
- 300 to 500 Hz - Wood: Particularly in upright basses, it's that distinctive, woody bark
- 800 to 1,600k Hz - Bite: The growl and attack of most basses can be either emphasized or toned down around here
- 2,000 to 5,000 Hz - String noise: Pretty straightforward here, I think
Guitar
 Image via youtube.com
Acoustic
- 120 to 200 Hz - Boom/Body: This is where you'll find most of the explosive low end on a mic'd acoustic that tends to feedback in the live world or be disruptive in the studio. A little bit here adds warmth and fullness on a solo performance, but in a dense band mix, it's probably better to get it out of the way
- 200 to 400 Hz - Thickness/Wood: This is the main "body" of most acoustic tones. Too many cuts here, and you're going to lose the life of the guitar somewhat
- 2,000 Hz - Definition/Harshness: This double-edged sword band will give the definition to the acoustic tone to hear intricacies in chords and picking, but too much will make it harsh and aggressive
- 7,000 Hz - Air/Sparkle: A touch, and I mean a touch, of a shelf boost here can help open up an acoustic sound
A note on acoustic guitar pickups (piezo, in particular): Making crazy 10 dB cuts? Contemplating making some absurd boost? You're probably not wrong – the acoustic pickup world can be the Wild West when it comes to tone. Some are great, and some are downright questionable. There are too many variables to even begin suggesting frequencies, so use your ears to guide you home on this one.
Electric
In general, I find a light hand with broad strokes to be most effective on electric guitar, if any EQ is applied at all other than some filtering. If you do decide to go hunting, however:
- 80 to 90 Hz and below - Mud: Lose it, crush it with your HP filter. There's pretty much nothing useful down here, and it will almost always just equate to flabbiness and noise in your tone
- 150 to 200 Hz - Thickness: This is where the "guts" of a guitar normally come from, but again, can quickly cloud a mix on you. Use sparingly, perhaps automate to add sweetness to a solo section or an exposed part, and then tuck it away when things thicken up again
- 300 to 1,000 Hz - Life: I call this the "life" of the electric, as many of the things that make an electric sound like an electric live in this range. So attenuating needs to be taken into consideration carefully. Too much though, and you start fighting with your snare and things like that, so take note
- 1,000 to 2,000 Hz - Honk: This is where honky and harsh characteristics can usually be smoothed out with a wide cut centered somewhere in this range
- 3,000 to 8,000 Hz - Brilliance and Presence: This is the range that can add shimmer or allow a guitar to cut through a mix when boosted. It can also be where you make cuts to keep a guitar from conflicting with a vocal. If making boosts in this range, keep an eye (ear?) out for noise, as any noise present from distortion/effects pedals will very quickly be accentuated as well
Keyboards
 Image by knownaa via Flickr / CC BY-SA 2.0
Piano
When looking at acoustic pianos, there are so many variations that can lead to differences in tone: upright vs. grand, hammer types, mechanical condition, the player, mic choices, and mic techniques. No matter what, though, the piano tends to be a behemoth in the mix – for better or worse – so most often you'll be looking to cut holes out for other things in your mix.
- 100 to 200 Hz - Boom: This can be a great place to add a little warmth to a solo piano in a studio environment, but more often than not will be the first place to cut some of the girth in a piano in a mix or help reduce feedback potential in a live situation
- 3,000 Hz and above - Presence: Adding a little "air" here can be great to brighten up a dark piano tone, depending on mic placement. Be careful not to bring out the noise of dampers on strings (particularly in the 3,000 to 5,000 Hz range), as this can quickly become distracting and jarring
Electric Piano (Rhodes)
If we're dealing with a real electric piano over a sample, things can be very situational as amp, mic'ing, and condition of the instrument itself can play such a huge role.
- 100 to 200 Hz - Boom: As with its acoustic counterpart, the low end can go from lush to overgrown Jurassic underbrush quickly. Particularly with the rich, dense harmonics of something like a Rhodes, cutting "mud" is usually your first order of business
- 800 to 1,000 Hz - Bark: Managing the "bark" and damper noise can sometimes be an issue, but if things are cutting through too much, odds are it's somewhere in this range
Clavinet
Honestly, I find myself treating this similarly to electric guitar, which is fitting considering the method of sound production. There are some idiosyncrasies to navigate with the attack that set it apart from its shoulder-slung brethren, but many of the same principles apply.
Organ (B3)
Much of a B3's magic comes from good mic placement and the player (the right drawbar settings are game changers). EQ should be applied sparingly and mainly as a corrective measure. Usually it's good to look to anything clashing with the bass (80 to 180 Hz), and if it's feeling a little "chubby" in the middle and either can't get out of its own way or doesn't play nice with other mid-heavy instruments or guitars, look to make cuts somewhere between 300 to 500 Hz.
Synths
While the near-infinite possibilities in the synth world can make this a hard one to generalize, there are some places you may start to look:
- 400 to 600 Hz - Thickness: Many synth sounds can get kind of muddy in this range and mess with the clarity of the sound itself, especially when you start layering multiple synths. Searching somewhere in this range is a good place to start
- 1,000 to 2,000 Hz - Cut/Bite: This is where you can usually find the attributes of a synth patch that are going to help it poke through the mix. Cut here to help tuck something back and out of the way, from guitars to vocals
- 3,000 to 4,000 Hz - Presence/Clarity: Also like voice and guitar, this range helps add excitement to a sound. And also like just about everything else mentioned here, too much of a good thing can be painful
Horns
 Image by Tim Sheerman-Chase via Flickr / CC BY-ND 2.0
Saxes
- 300 to 400 Hz - Honk/Woof: This somewhat depends on what type of sax we're dealing with, soprano to baritone. As we go lower, this point is also going to move lower
- 1,000 to 2,000 Hz - Squawk: Again, the type of sax itself may cause this point to float a little more, but you can cut the "parrot on a 'roid-rage bender" tendency of some instruments here
- 6,000 Hz - Reed noise: As saxes generate sound from a thin piece of wood vibrating in an air stream, there's a noise that sometimes accompanies this. Right around this point is where to start looking for that vibration
Brass
This can be applied to all brass in general, but particularly with trumpet and trombone in mind.
- 100 to 200 Hz - Boom/Mud: This is particularly pointing at the trombone, as it sometimes shares the range of the bass and the rest of the rhythm section, but rarely functions in that purpose. Getting it out of the way is usually best, as this range will serve little except to cloud most mixes
- 4,000 to 10,000 Hz - Brightness: This top end can brighten up a dark horn section. However, trumpets can nearly take someone's head off in this range with a good blat, so managing this band is key here
Vocals
 Image by Bryan Ong via Flickr / CC BY-NC-ND 2.0
The human voice: simultaneously one of the most fickle and yet most important pieces of any mix. Male voices, though typically lower than female, are actually more complex in their overtone structure, meaning that at least equal attention needs to be paid to the high end of a male vocal as a female.
- 100 Hz and below - Rumble: For most vocals, all you'll find down here is mic-handling noise, stage/floor vibrations, air conditioners, etc. Get rid of it
- 200 Hz - Boom: This frequency is usually where you'll find the "head cold" sound. The female voice may run a little higher, but this is the ballpark. Anyone with allergies or sinus issues knows exactly what I'm talking about
- 800 to 1,000 Hz - Word Clarity/Nasality: Not enough and intelligibility of some lyrics may be unintelligible, too much and you get the teacher from Peanuts
- 3,000 Hz- Presence/Excitement: This is right around the point that tends to add some energy, or some "buzz" to a vocal. Not enough, and the vocal may sound deflated, flat, and dull. Too much, and your listener will feel like he or she is getting poked in the ear canal with a chopstick every time the vocalist opens his or her mouth
- 4,000 to 8,000 Hz - Sizzle/Sibilants: Typically this is the range a de-esser is handling. If your vocalist sounds like meat hitting a hot pan at the end of any word ending in "s" or a similar sound, this is where to hunt
- 10,000 Hz and up - Air: Want to "open up" your vocal a little? Apply a light shelf boost around here and that should do it. This is not always necessary, though, and simply adding "air" for the sake of it can make things harsh, brittle, and introduce noise to the sound
For more tips on getting the best sound every time, check out more from our resident "Angry Sound Guy."
Aaron Staniulis is not only a freelance live sound and recording engineer, but also an accomplished musician, singer, and songwriter. He has spent equal time on both sides of the microphone working for and playing alongside everyone from local bar cover bands to major label recording artists, in venues stretching from tens to tens of thousands of people. Having seen both sides at all levels gives him the perfect perspective for shedding light on the "Angry Sound Guy." You can find out more about what he’s up to at aaronstaniulis.com.