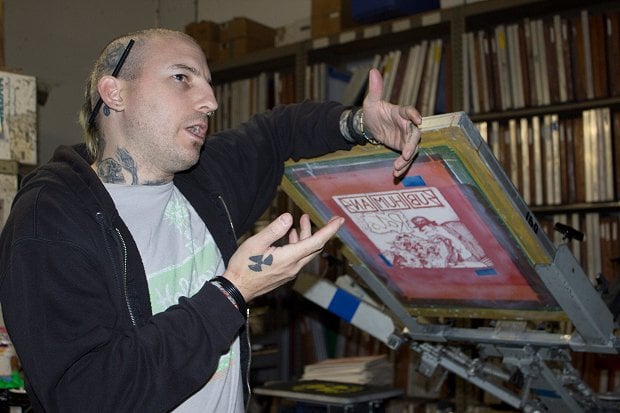
 Radiation Records owner Nat Paul screen prints the label's merchandise. (Image via dailytitan.com)
A version of this article originally appeared on Performer Magazine.
Spending too much on promo items for your band? You want the freedom to focus on your band without going broke in the process. Well, here's a way to kill two birds with one proverbial stone: start making your own merch.
Many bands go through the Sticker Guy for stickers or Disc Makers for their CDs as these are fairly inexpensive services. T-shirts tend to be the priciest of the bunch, unless you know how to do it yourself. Screen printing is also substantially simpler than you might be led to believe.
Marc Pinansky (of the band Township) recently started making his own shirts to peddle at his solo shows. "First, people asked. That gave me a good excuse to try my hand at screen printing. The idea that I'm hand-making these shirts fits in perfectly with the theme of my solo career – it's all very hands-on and simple. It's nice to see the philosophy of the music carry over to the merchandise."
When asked about the process, he comments, "It was relatively simple and fun to learn. Like any art project as a child, there is a bit of wide-eyed wonder when you see something that you have created from nothing. The hardest part of the process for me is that there are several small steps that can easily be overlooked and will ruin a shirt if not done properly. Also, despite its simplicity, it can be a very time- and space-consuming project. I would recommend taking the project slow, so each step is well executed and you don't eat up a whole day with a mediocre product to show for it."
This step-by-step guide will help you start making profitable merch. Best of all, these techniques can also be applied to hats, bags, posters, and more.
To get started, you'll want to purchase a screen printing screen. It's easier to start with a kit since it has all the components you need (screens, fabric ink, and a squeegee), and can be found for a relatively low price at most craft stores. One recommendation is the Speedball Fabric Screen Printing Kit (which can be purchased online for $39.99 or at your local AC Moore store). You'll also need an X-Acto knife, some extra blades, and blank shirts, bags, bandannas, or other items you plan to customize.
- Decide what you want for your design. It can be as intricate as you're willing to take the time to cut out. Draw out your design first, and determine if you'll need to do multiple screens to get everything on there you'd like (multiple designs placed in different areas on the shirt will necessitate more cut-outs).
- Cut out your design with the X-Acto. Remember, anything that's cut out will show up when you print the shirt, so only cut out what you want to show up on the final product. At times you'll have to let lines of paper remain to hold the cut-out together.
- Affix your design to the screen with tape, place a sheet of white paper or cardboard inside the shirt so that the ink won't bleed through onto the other side, and place the screen over the area you'd like to print.
- Have a bandmate hold down the screen, put ink onto the screen, and use the squeegee to press the ink through the screen by dragging it back and forth over the area to be inked. The number of times you must do this will be determined by the pressure you apply to the squeegee and the area to be inked. The larger the area, the more ink, and the more times you should go back and forth over the design. For a design approximately 8" x 10", you shouldn't be pressing the shirt for more than 30 seconds. Otherwise, you may over saturate (and ruin) the paper, making it impossible to print more than a small handful of shirts.
- Lift the screen from one side, ensure that the ink has properly transferred, and then remove the screen. Place the shirt to the side; it will need to dry for approximately 15 minutes before you can do anything else with it. A good cut-out with a skilled squeegee artist can produce about 30 T-shirts before the paper will be too wet, and you start to risk bleeding on the shirt.
- When the shirt is dried, you may add more designs by following the above steps, or you'll need to steam-free iron the shirt with a towel over it in order to set the ink. If you do this, the shirt will last hundreds of washes. If you don't, it'll likely wash out during the first cleaning.
The process takes practice in order to get it right. If you make 30 shirts of one unique design, the approximate cost will be $110. This means each shirt will cost approximately $3.70. Once the initial investment is covered though, you'll only be paying the cost of the shirt ($2-3) and additional ink ($2-10 depending on style, color, and quality/company).
Have you ever made your own DIY band merch? Share your tips in the comments below!
Andrew Lapham Fersch is a Boston-based music journalist who has contributed to Performer Magazine, Verbicide Magazine, and Steez Magazine, among others. He's also a teacher who believes that we should change the way that public education works, and has been a guest speaker at TEDx events discussing ideas for education reform. Read more of his work at alrightimwrong.com.