Recording a full band at home can be a struggle for many due to limitations such as space, equipment, and environment. Unlike professional recording studios where different instruments can be isolated and recorded together, home recordings are often done in your bedroom, basement, or living room. While these spaces are hardly ideal for a simultaneous recording of your band, there are ways around it, and I'm here to give you some advice about how you can successfully record your band in the comfort of your own home.
You can sign up for Splice to download this multi-track Logic session or stems, and follow along to learn more about the techniques we discuss in this article.
1. Pre-production
I've engineered many sessions and cannot stress enough the importance of pre-production. Pre-production, simply put, is making sure that as a band, everyone knows his or her part in the song that's going to be recorded. Planning ahead sets up for a smooth recording session and allows the creative process to flow and not get hindered.
One tip I tell my clients before walking into the studio is to try to do a simple MIDI mockup of the arrangement of the song for the whole band to listen. A MIDI mockup is essentially an arrangement of your song that is done using software instruments in the DAW of choice. In this project, I took the time to draft an arrangement so that the rest of my band members were clear on what their parts were and the overall feel of the song. Knowing what to play and when to play it wins half the battle when recording at home or in the studio.
2. Plan your recording
Part of the pre-production process involves planning out how you want to record. For this project, I knew that I had to record drums, bass, guitar, and Rhodes, but at the same time, I knew that I didn't have the space to record everyone simultaneously. In this case, a way around it was to use a method of recording called overdubbing. Overdubbing is the process of recording one instrument at a time and then layering another instrument on top of the previously recorded instrument. One benefit of overdubbing is that you lose any microphone bleed from different instruments when recording all at once. It also gives you greater control of your tracks when mixing.
When overdubbing, you need to consider how many channels you need to record at one time and make sure you have the right audio interface for it. In this project, I knew that I would be recording drums, and that needed a total of eight channels. Thus, I made sure that I had an audio interface with at least eight preamps to record drums and the rest of the instruments later on. Decent eight-channel audio interfaces include Universal Audio Apollo and Presonus FireStudio Project.
3. The recording process
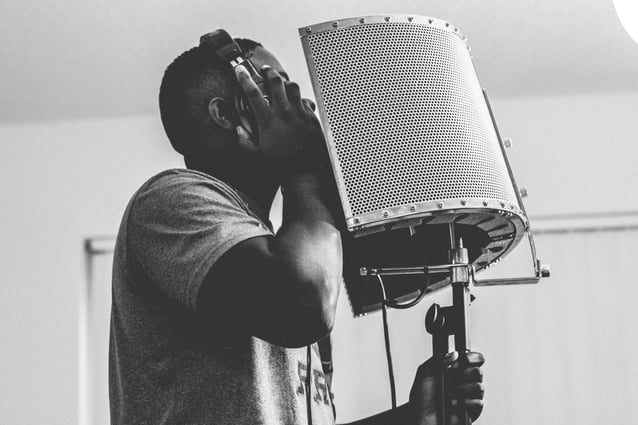
Microphone selection and monitoring are two of the biggest things you should pay attention to when recording your band at home.
Mic selection
There are endless choices of microphones out there for the home studio. If you're just starting out recording your band, I would recommend investing in a drum mic kit such as Shure PG Drum Kit, a decent small diaphragm condenser mic like the Shure KSM141, a good DI box such as Radial JDI, and a decent vocal and all-purpose mic such as the AKG C414. This equipment should allow you to get by recording anything from drums, guitar, bass, vocals, and even horn and orchestral instruments.
[The Essential Guide to Microphone Pickup Patterns: What Every Musician Needs to Know]
Monitoring
Monitoring during recording is the process of allowing your band member to listen back to his or her instrument as well as other tracks, like a click track. Monitoring is usually done in the DAW of choice where you "send" the tracks that you're recording and playing back through the audio interface to the band member. It's best that you make use of headphones to monitor instead of playing it back through studio speakers or loud speakers, as this helps minimize bleed and prevent feedback loops.
In this project, I started with recording the drums, and because I have a MIDI mockup, I could let my drummer monitor the MIDI Rhodes, bass, and piano parts. Using this technique, my drummer felt like he was playing with the rest of the band, thus allowing him to play with a live feel despite being the only one recording.
After the drums were recorded, I called my bass player to lay his parts and recorded it through a DI box. A DI box takes the direct signal of the bass without the need of recording an amp. This is useful as later on I can use software re-amping tools such as Native Instrument’s Guitar Rig to simulate an amp sound if I wanted to. Another benefit of using a DI box is that it's quiet and allows you to record instruments such as bass, guitar, and keyboards late at night without disturbing anyone. Lastly, the guitar and Rhodes were recorded together through two separate DI boxes to wrap up the session.
I hope this article has given you some insight into how to run a home recording session and the process behind it. There are many other tips and tricks such as microphone placement and DAW tools, but the most important thing is to always plan with your band for the recording, make sure you have the right tools, and you should be ready and good to go. Have fun!
Learn more about recording:
- How to Create Your Own DIY Recording Studio
- Can You Fix It in the Mix? How to Handle Your Recording Mistakes
- 5 Tips Every Musician Needs to Better Prepare for a Recording Session
- How to Set Up Your Recording Studio Environment for Creativity
Reuben Raman is an audio engineer and producer with experience in recording and mixing for various bands and artists in New York City and Singapore.