 Image via seymourduncan.com
In the coming weeks, we're going to be talking about some cool custom modifications and projects you can do for your studio or live rig. Some of these projects will include some basic soldering, so what better place to start than at the very beginning?
For many musicians, the idea of talking a soldering iron to your equipment seems daunting, but I assure you it's nowhere near as difficult as it sounds. If you have some patience, common sense, and a set of steady-ish hands, this can be a great way to save yourself a ton of money in the long run, and get exactly what you're looking for our of your gear.
Let's start with what you're going to need for a basic soldering setup.
The essentials
- Soldering iron. Obviously. However, there are a number of options out there. It's important to look into something with adjustable temperature control, as this will ensure you're not going to apply more heat than you need, and that you will know how hot the iron actually is. This can be critical when working with finer components.
- Desoldering pump. Sometimes referred to as a "solder sucker," this works like a tiny vacuum to remove old or excess solder while in liquid form.
- Wire cutters and wire strippers. While working with wires, you're going to need a way to remove insulation or trim things to the length you need,
- Solder. Usually something like 40/60 lead/tin with a rosin core. These solders contain something called flux (cue Doc Brown joke), which helps to make things clean and easy for you.
Recommended extras
- Extra tips. Having additional options for tip styles depending on the specific situation, or just as a backup, can be helpful!
- Helping Hand. This doesn't involve bringing a friend. Helping Hands are essentially an adjustable set of alligator clips on a heavy metal base that allows you to hold things in place while you work on them. Anyone who has tried to work on a fine detail job only to have it move at the last second knows how much of a lifesaver these can be.
- Multimeter. Having a way to check voltage, resistance, or even being able to make sure you soldered the right wire to the right place can be invaluable.
Soldering basics
Tining
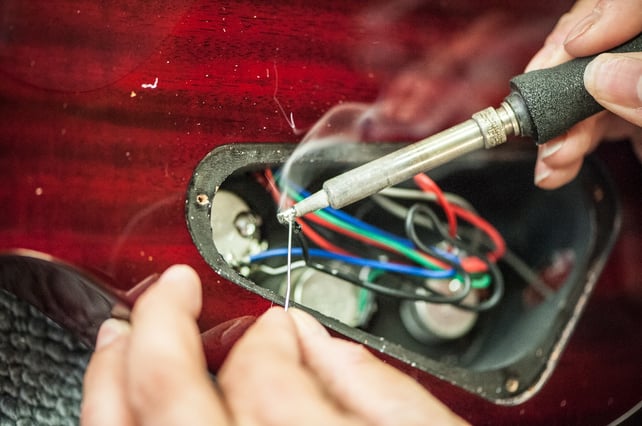
Tining is the practice of applying a little bit of solder to the surfaces you're going to solder with. This usually includes the tips of any wire you're going to work with and the tip of the iron itself. You'll usually see a little puff of smoke when you hit anything you've heated with the iron with the solder. This is the flux burning off, and it isn't a concern, though you should take care not to inhale all of this goodness.
Preparing wires
Whenever you're going to solder new wires, you want to make sure you have a clean tip to start with. This is where the wire strippers come in, as you'll want to strip back the insulation to expose just enough wire to work with. Too much, and you'll leave yourself the potential to short out your new connections; too little, and it's going to be difficult to work with and get a good connection. Once you have the wire exposed, tin it as described above by simply heating the wire with the iron, and then applying the solder to the wire tip (not the soldering iron tip).
Soldering connections
This is actually easier than you might think, but it's often the place where many peoples' techniques come apart.
Once you have prepared the two points you want to solder together, heat both of them with the iron for a few seconds. Once you've heated both and they're placed in the configuration you'd like to set them in, apply the solder to the joint itself, not the soldering iron tip. Once a little bit of solder has flowed into the new joint, remove the solder, and then remove the iron. The new joint should be clean, shiny, smooth, and have just enough solder to secure the connection and no more.
Moving the joint prematurely, not heating it thoroughly enough, or not preparing the surfaces properly can result in a "cold solder." A cold solder looks dark, rough, and will often lead to an unreliable connection. You also don't want to use to much solder; more is not better. More solder will leave things a mess and lead to potential issues with clean and reliable connections.
Time to practice!
Now, the most important part of all: practice. Just like anything in music, practice these basic techniques until you're comfortable enough to apply them.
Check out the great soldering video below for a more visual representation of the points mentioned above, and check back in the coming weeks for some fun DIY project ideas!
Next up:
- 3 Kinds of Upgrades That Should Be on Every Gigging Musician's Horizon
- 4 Smart Tips to Save Your Dying Music Gear
- 10 Signs That You're a Gearhead
Aaron Staniulis is not only a freelance live sound and recording engineer, but also an accomplished musician, singer, and songwriter. He has spent equal time on both sides of the microphone working for and playing alongside everyone from local bar cover bands to major label recording artists, in venues stretching from tens to tens of thousands of people. Having seen both sides at all levels gives him the perfect perspective for shedding light on the "Angry Sound Guy." You can find out more about what he’s up to at aaronstaniulis.com.